# SMTP service settings
1. Mailtrap
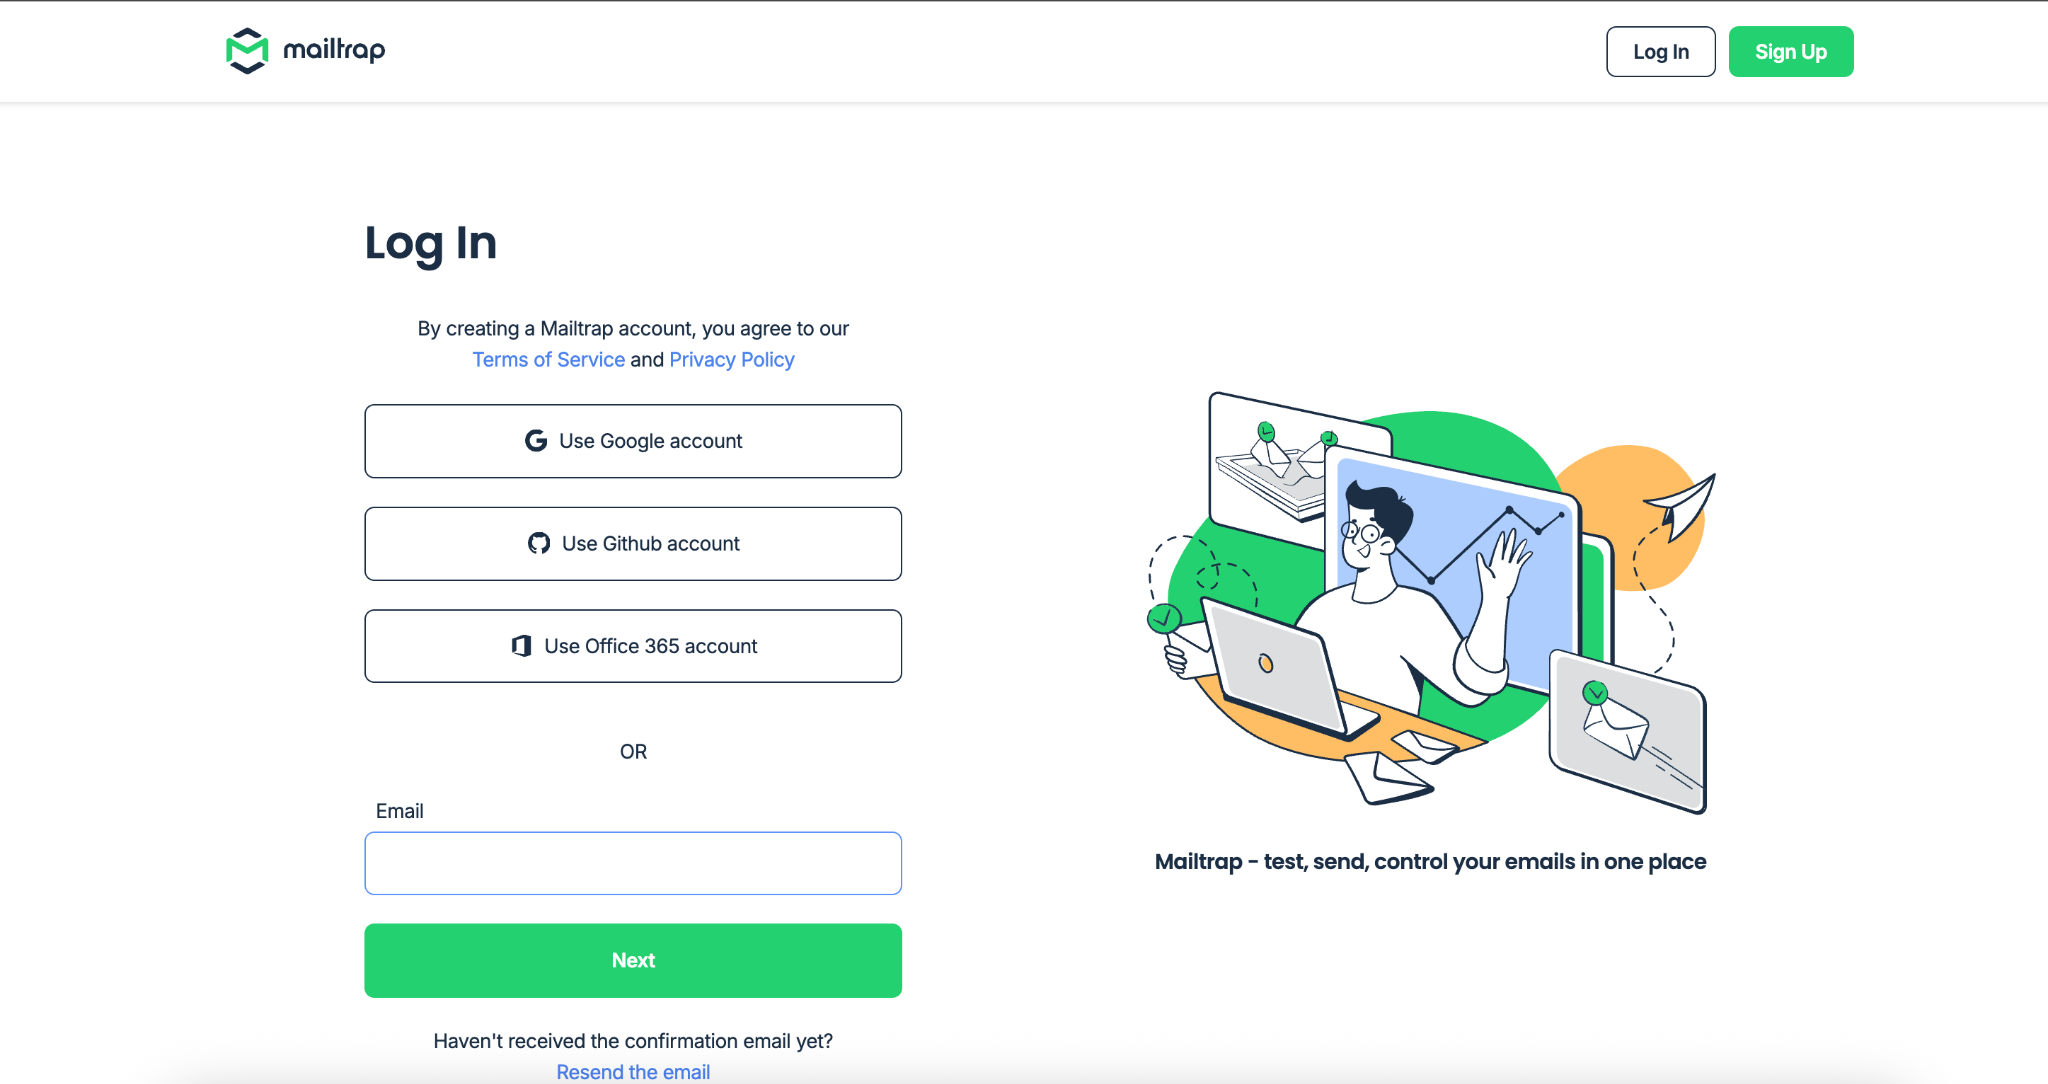
1.1 Registering with Mailtrap. Go to the official website[ ](https://mailtrap.io/).If you don't have an account yet, click the **Sign Up** button in the top right corner and complete the registration. If you already have an account — use the **Log In** button to sign in.
1.2 When creating an account you can sign in via **Google**, **GitHub** or **Office 365**. If you want to register using an email address, click the **Sign Up With Your Email**.
1.3 If you chose to register by email (**Sign Up With Your Email**), fill in the three fields:\
**Email** — your email address.\
**Password** — the password.\
**Confirmation** — password confirmation.
1.4 After registering a confirmation window will open. An email from Mailtrap will be sent to your mailbox to confirm the account. In the email click the **Confirm my account**button to complete the confirmation process.

1.5 You will then be redirected to the login page of **Mailtrap**Enter the credentials you used during registration to log into the account.
1.6 The next step is to fill out the **Mailtrap**form. Please answer their questions.
For the question **Which product(s) do you plan to use?** select **Email API / SMTP.**
For the question **Which domain will you use for sending emails?** specify the domain from which you plan to send emails. To start sending emails through Mailtrap, you need to add this domain.
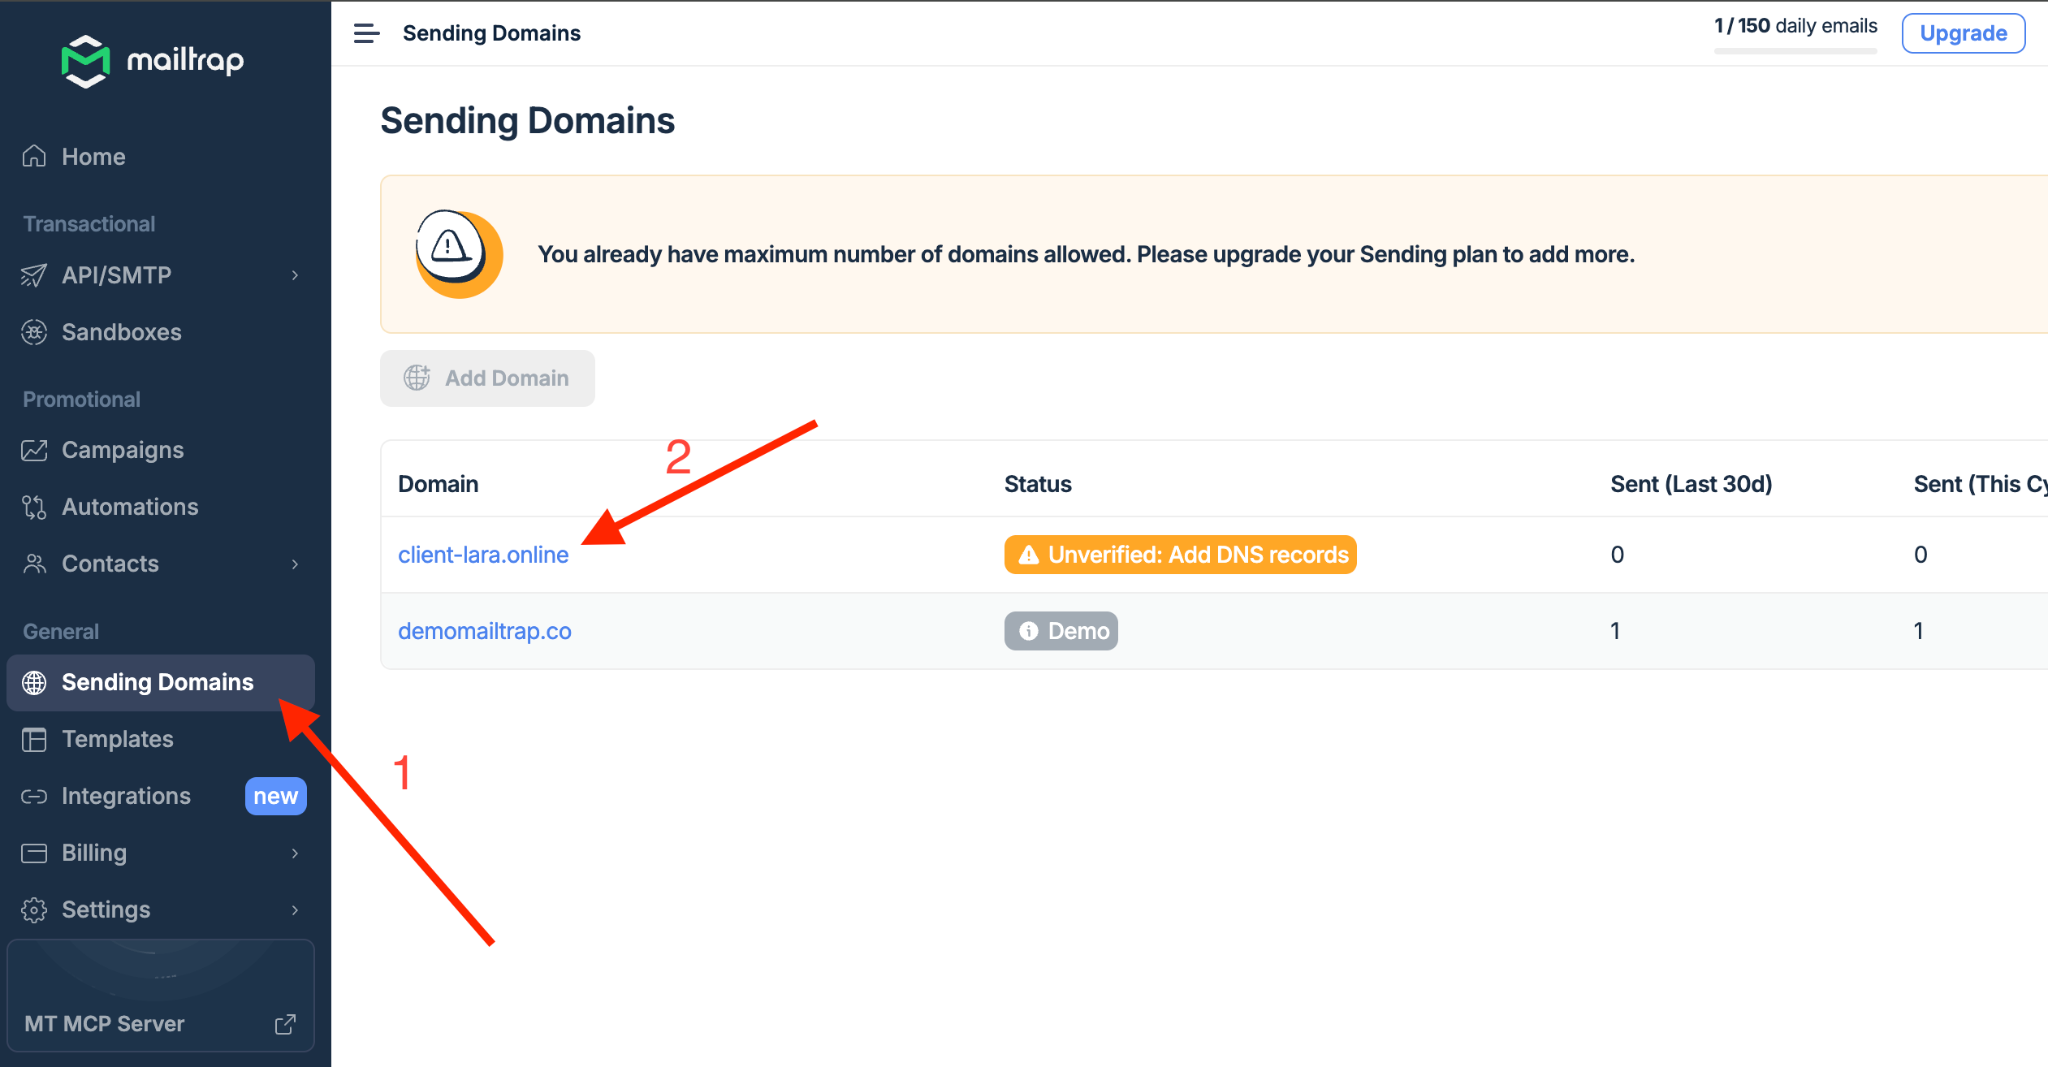
1.7 To verify the domain go to the menu **Sending Domains** and select the domain from which you plan to send emails.
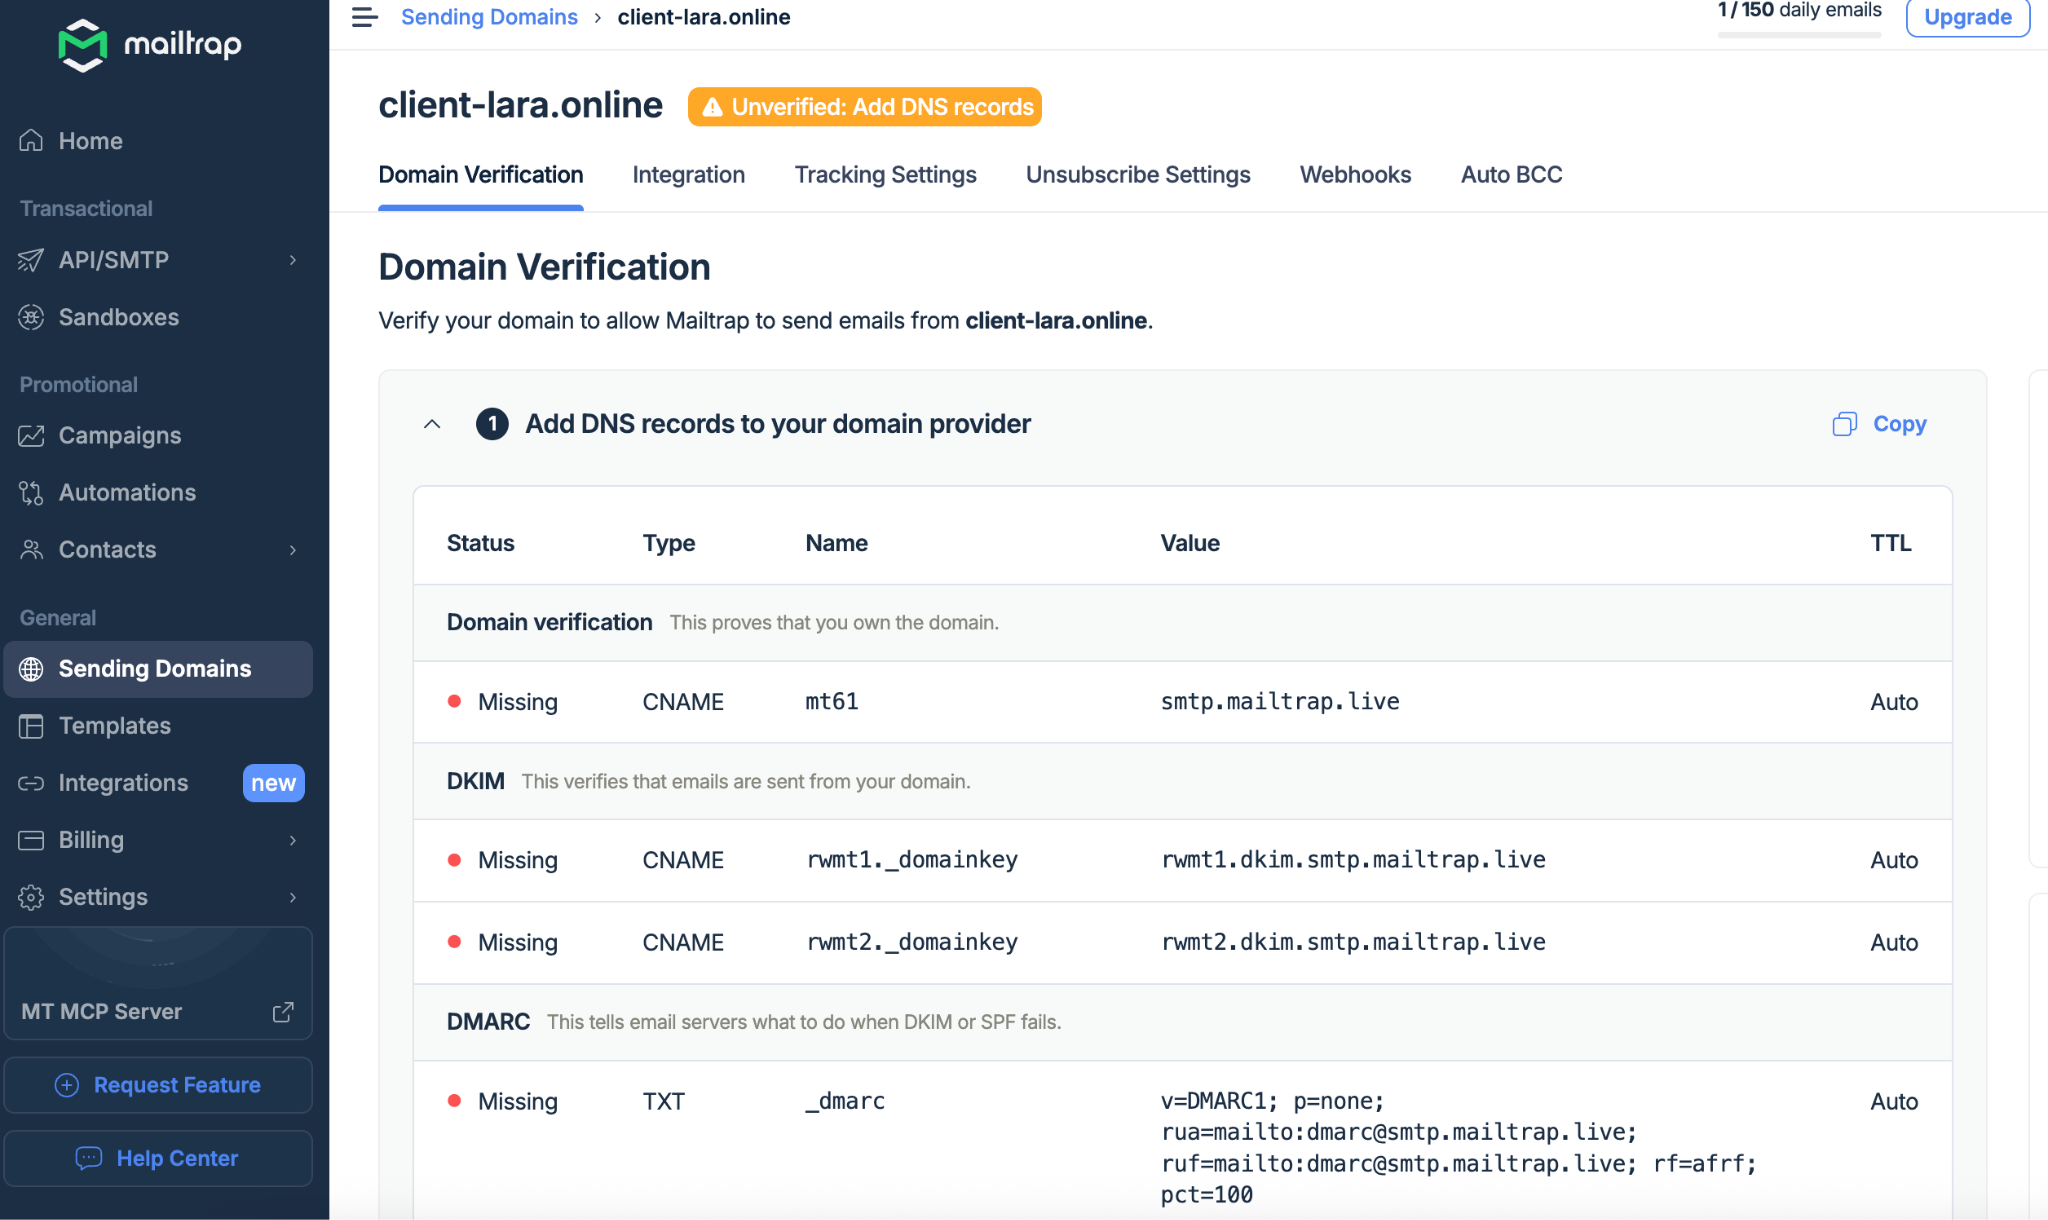
1.8 Next you will see the domain verification management page. Below **Mailtrap** will show which DNS records need to be added to verify the domain.
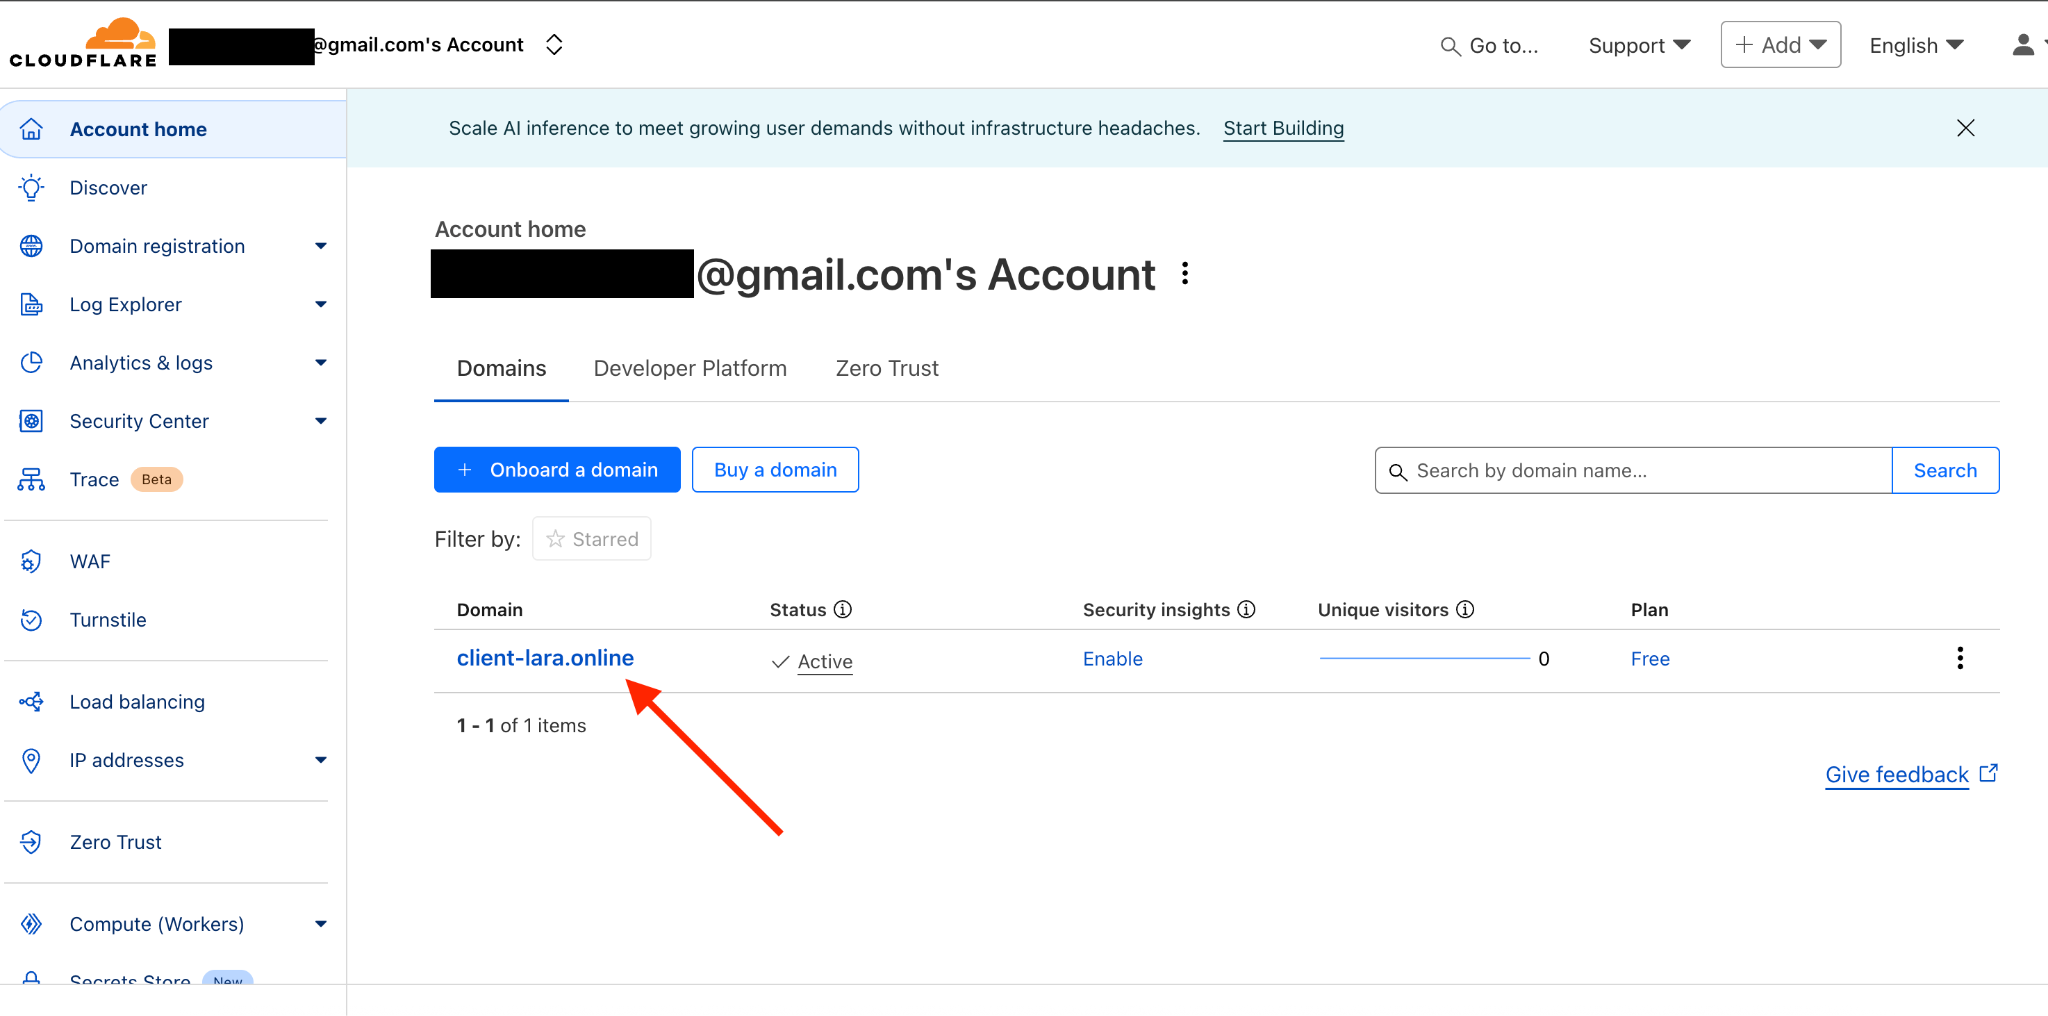
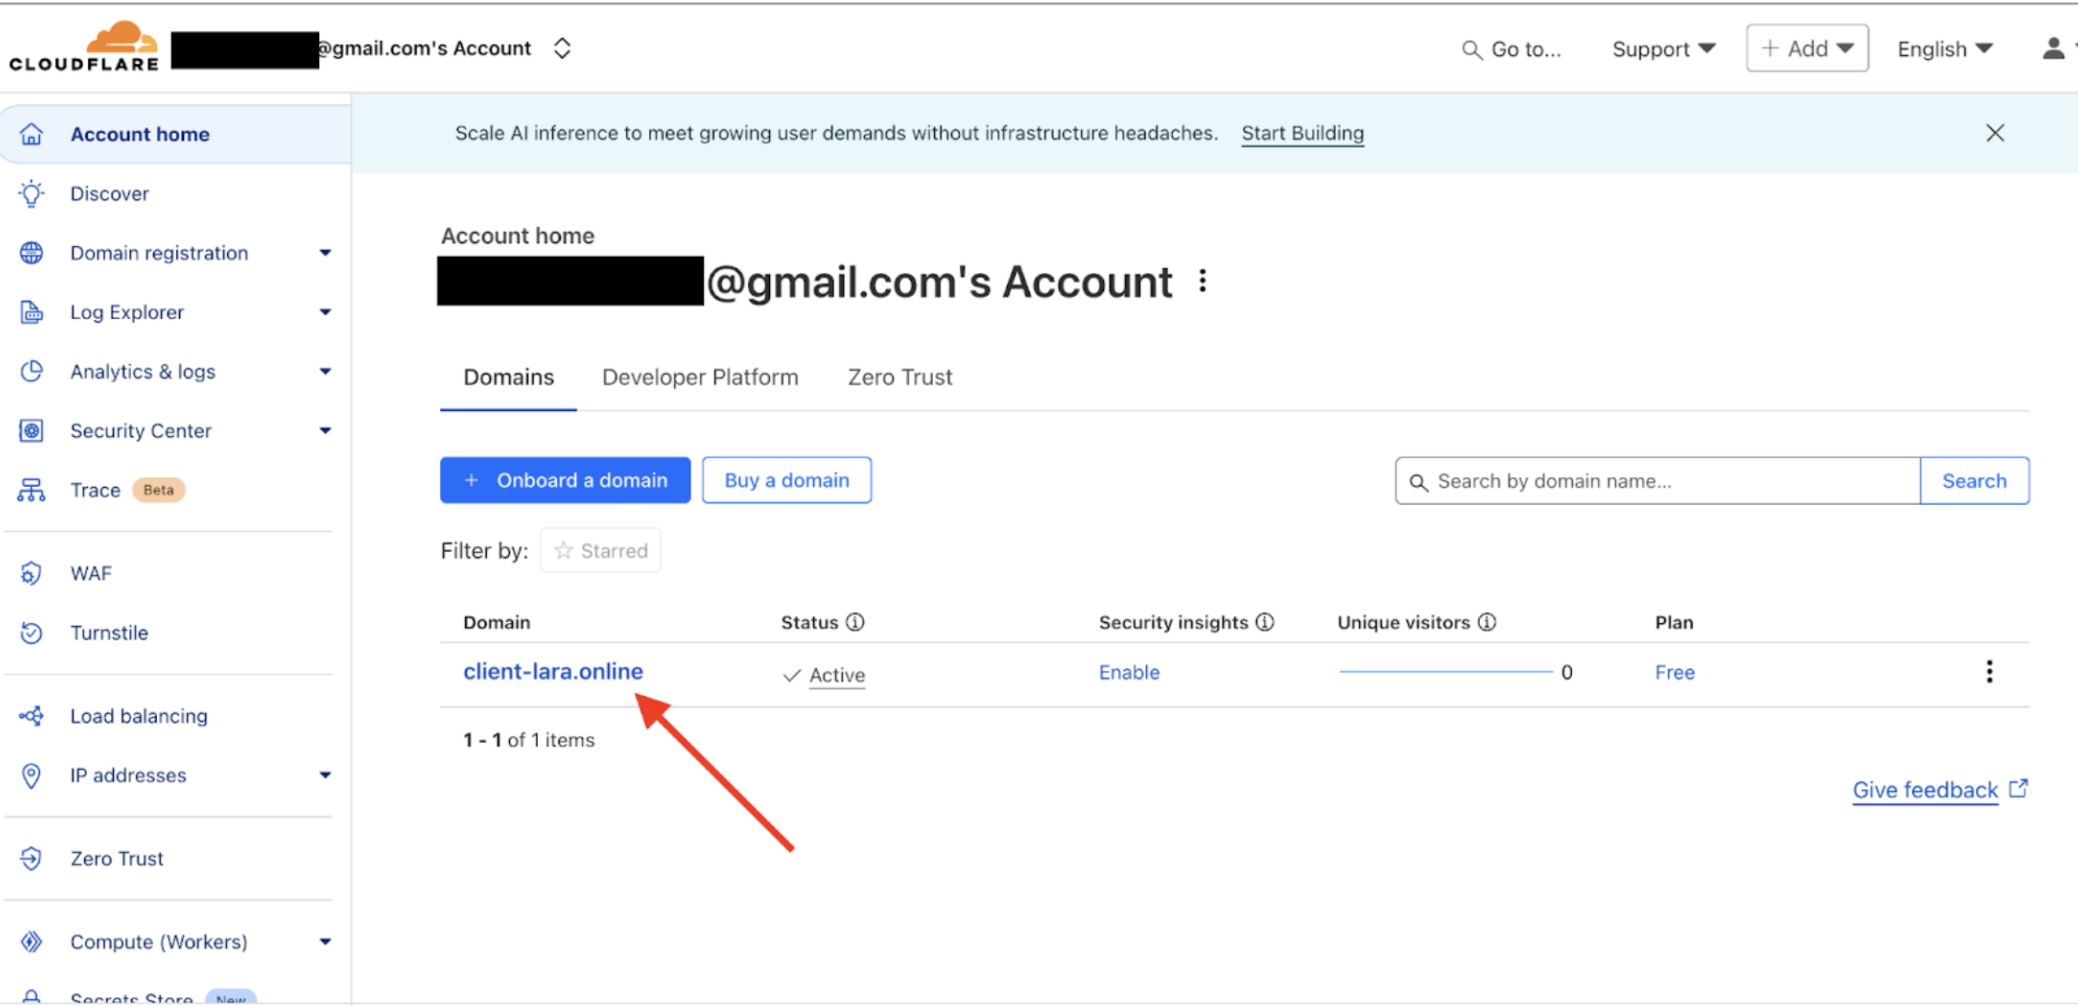
Go to your **Cloudflare**account where the domain is registered and select the appropriate domain to add the DNS records.
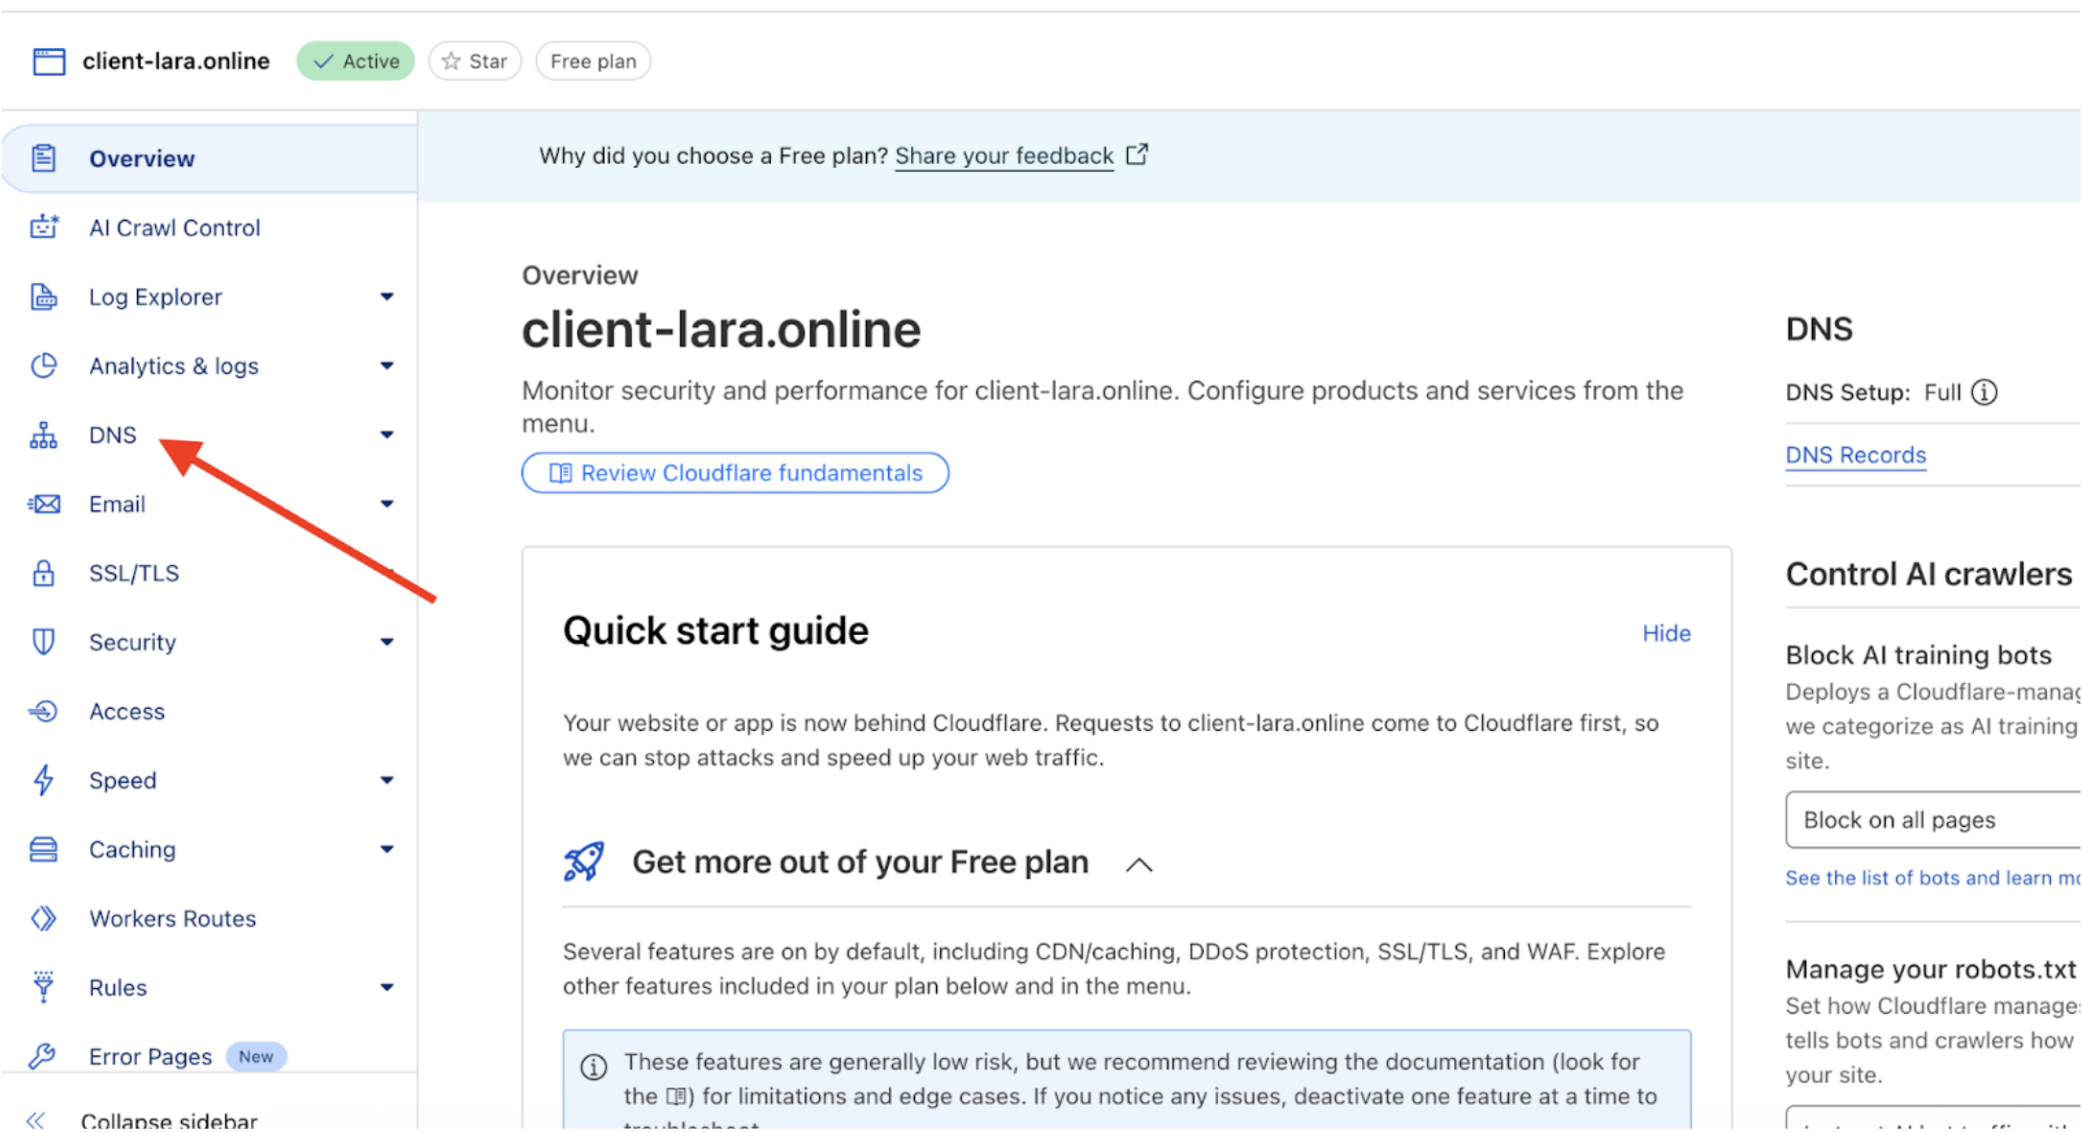
Click the DNS menu to add the required DNS records.

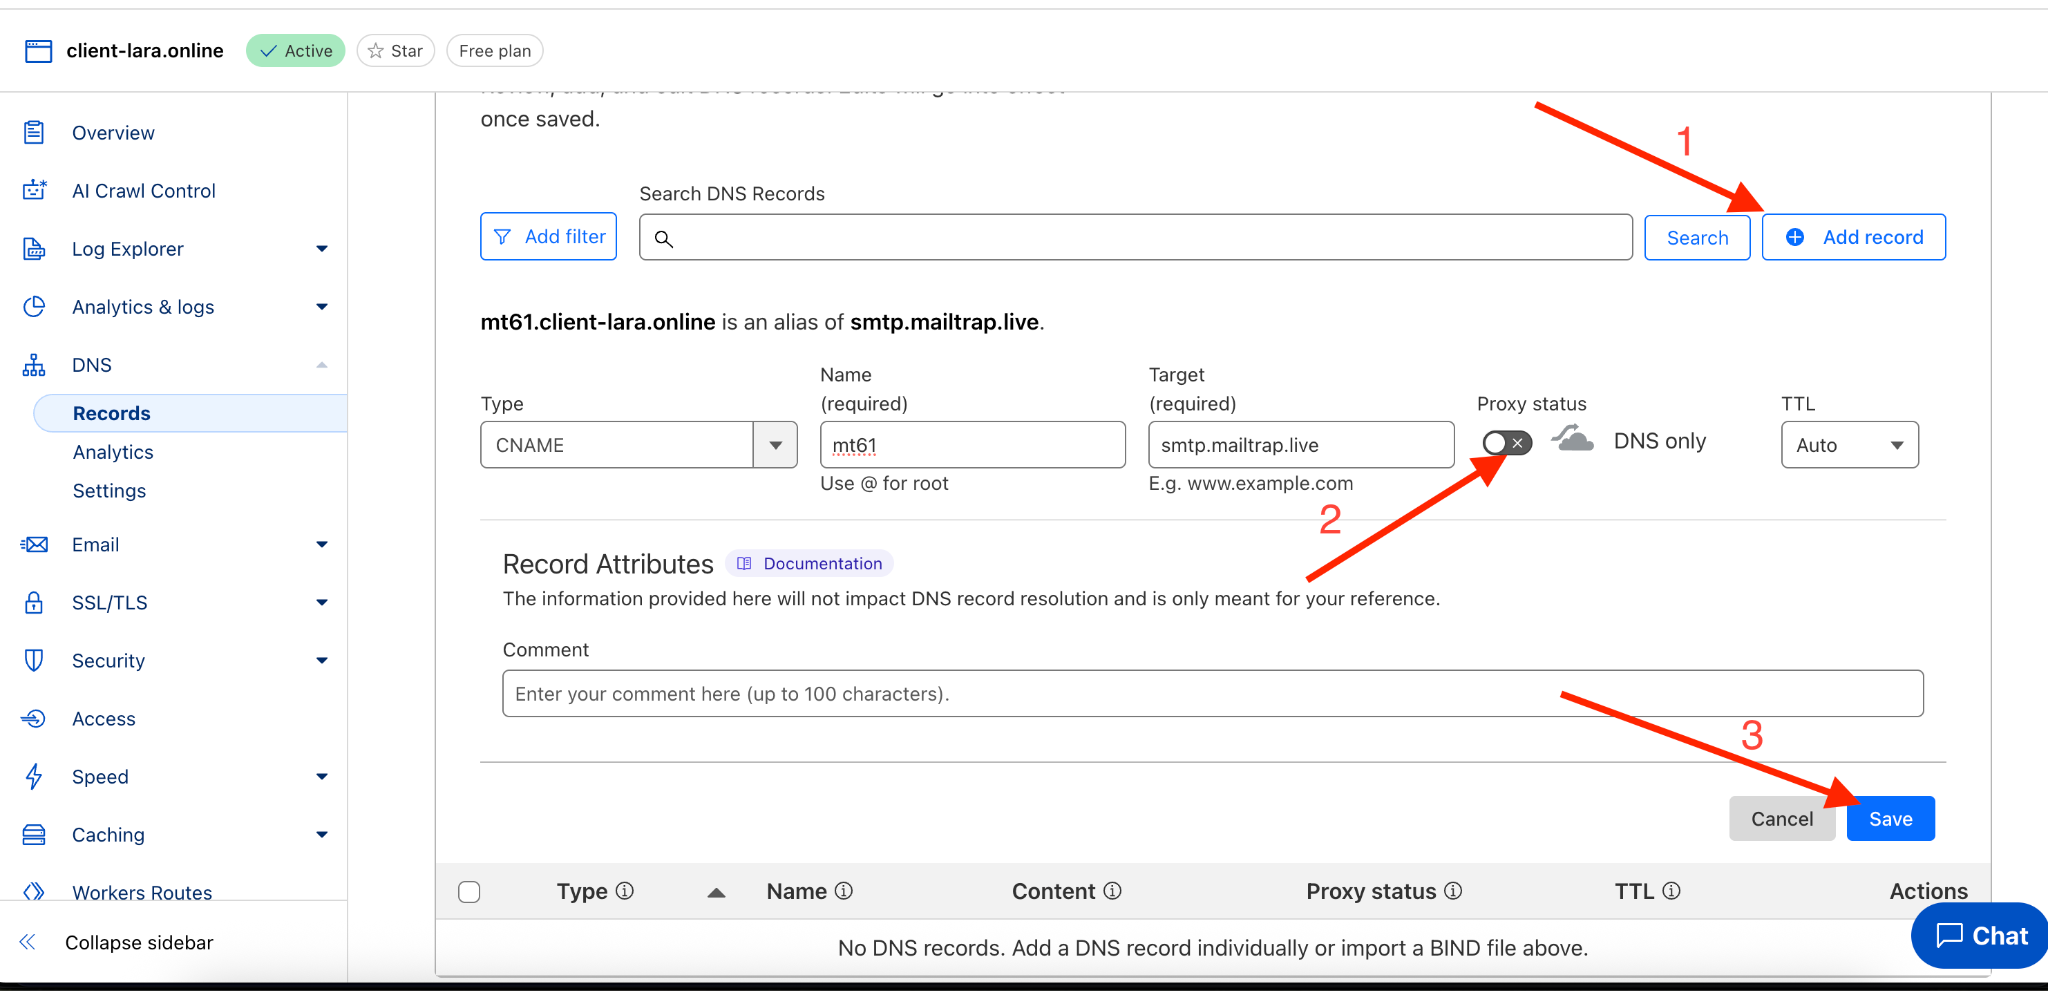
On the next page click the **Add record** button and fill in the data provided by **Mailtrap.**
**Important! If the DNS record type is CNAME, when adding the record in Cloudflare be sure to disable the orange cloud (Proxy status) so that it appears gray, as shown in the example below.**
After entering the record click the ***Save*** to save.
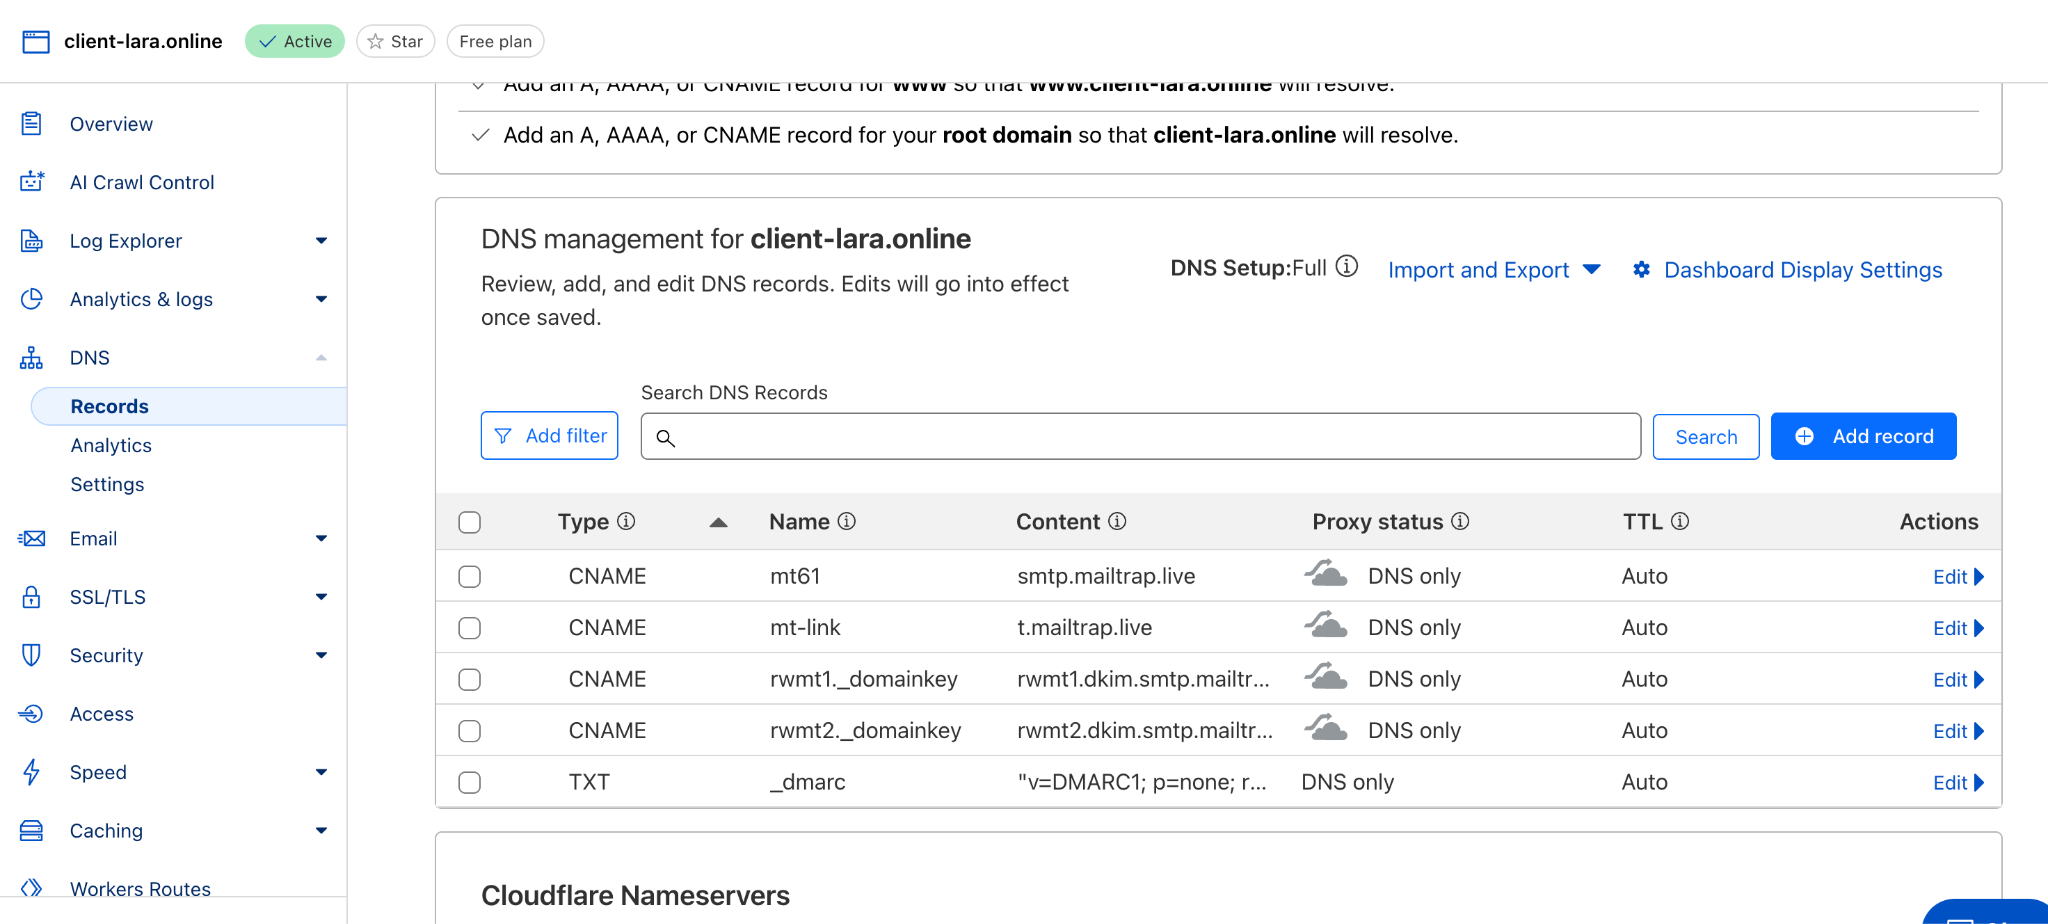
button. Your DNS records in **Cloudflare**.
should look approximately like this **Mailtrap** and click the **Return to your account** Verify DNS records
**to check the entries you added.**

Important: verification may take some time, so not all records may be verified immediately.
\
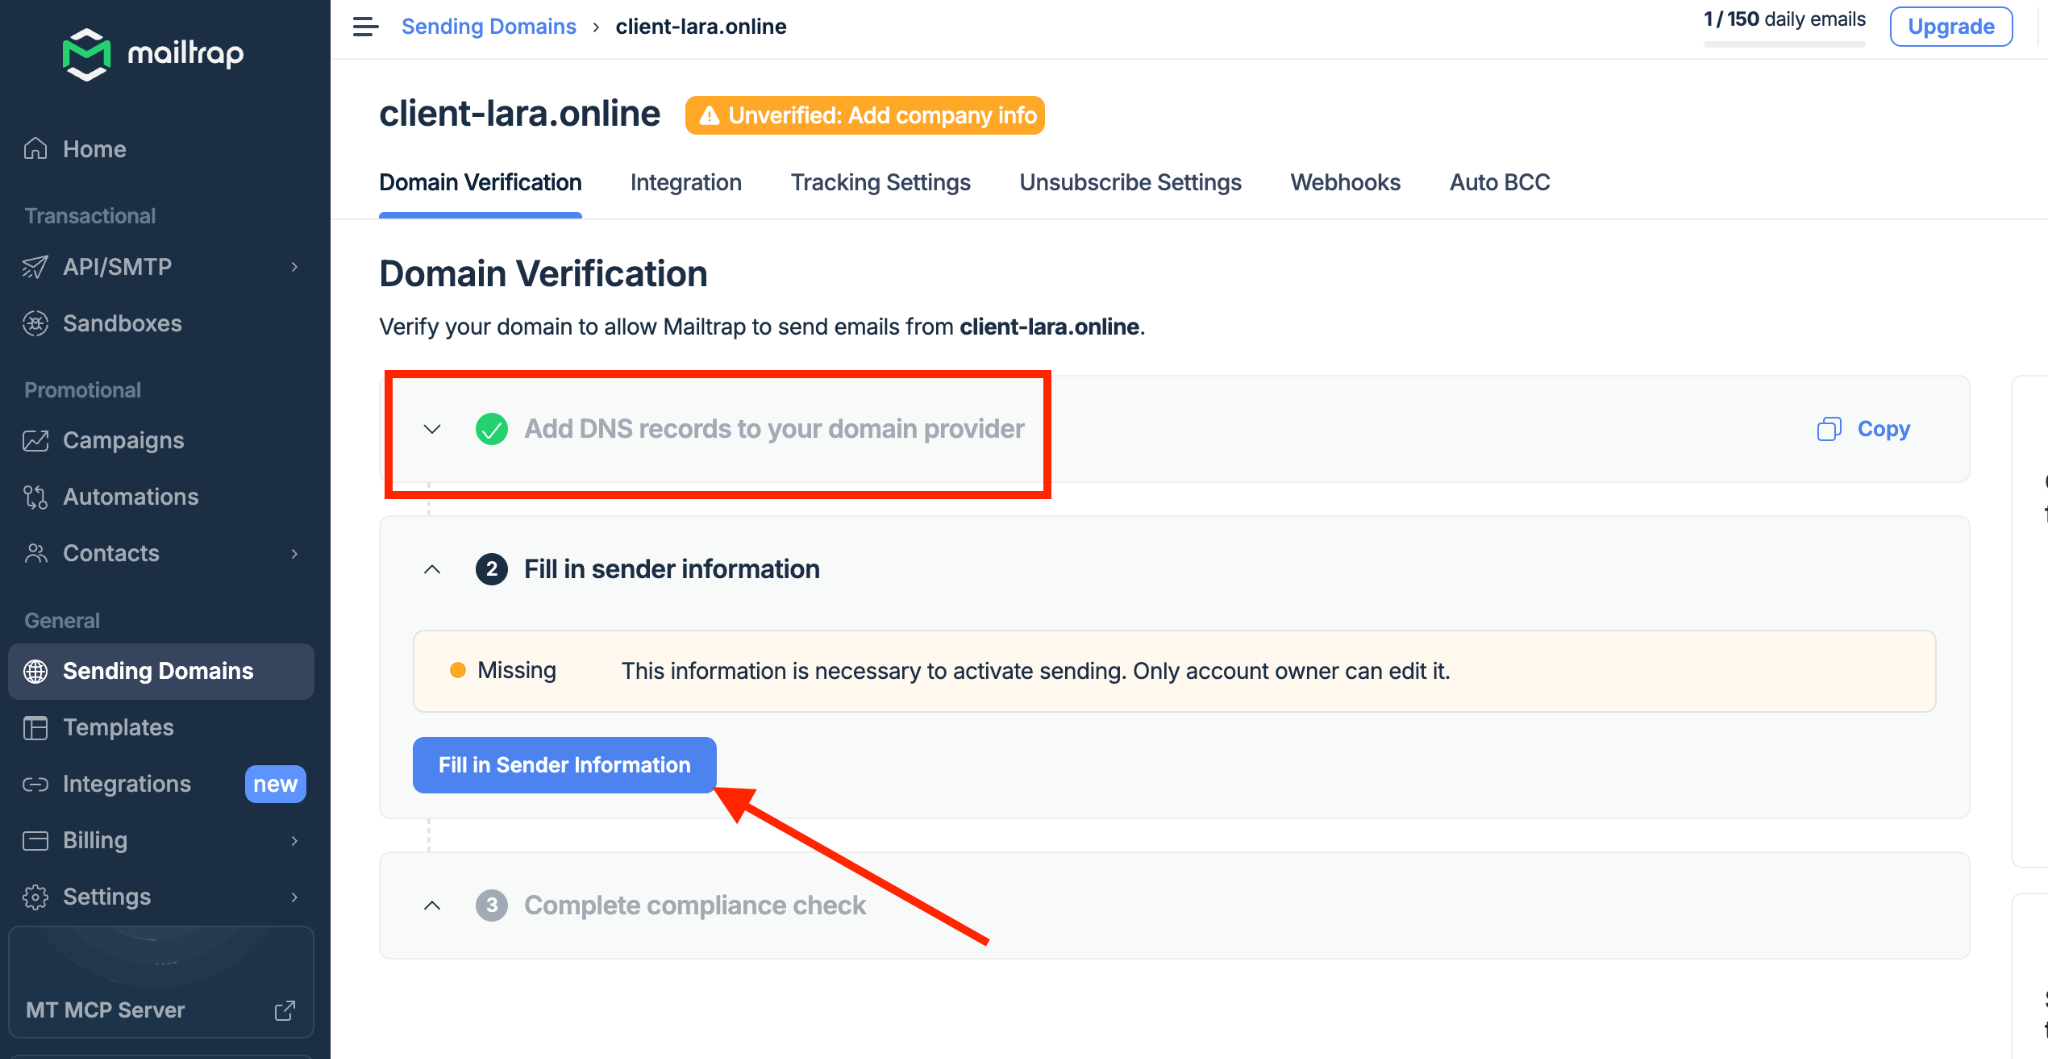
1.9 After you see that your domain is verified via DNS records, you can proceed to the next step — filling in the sender information. **After clicking the button to fill in the sender information a modal window will open. Complete the appropriate fields and then click the** to save.

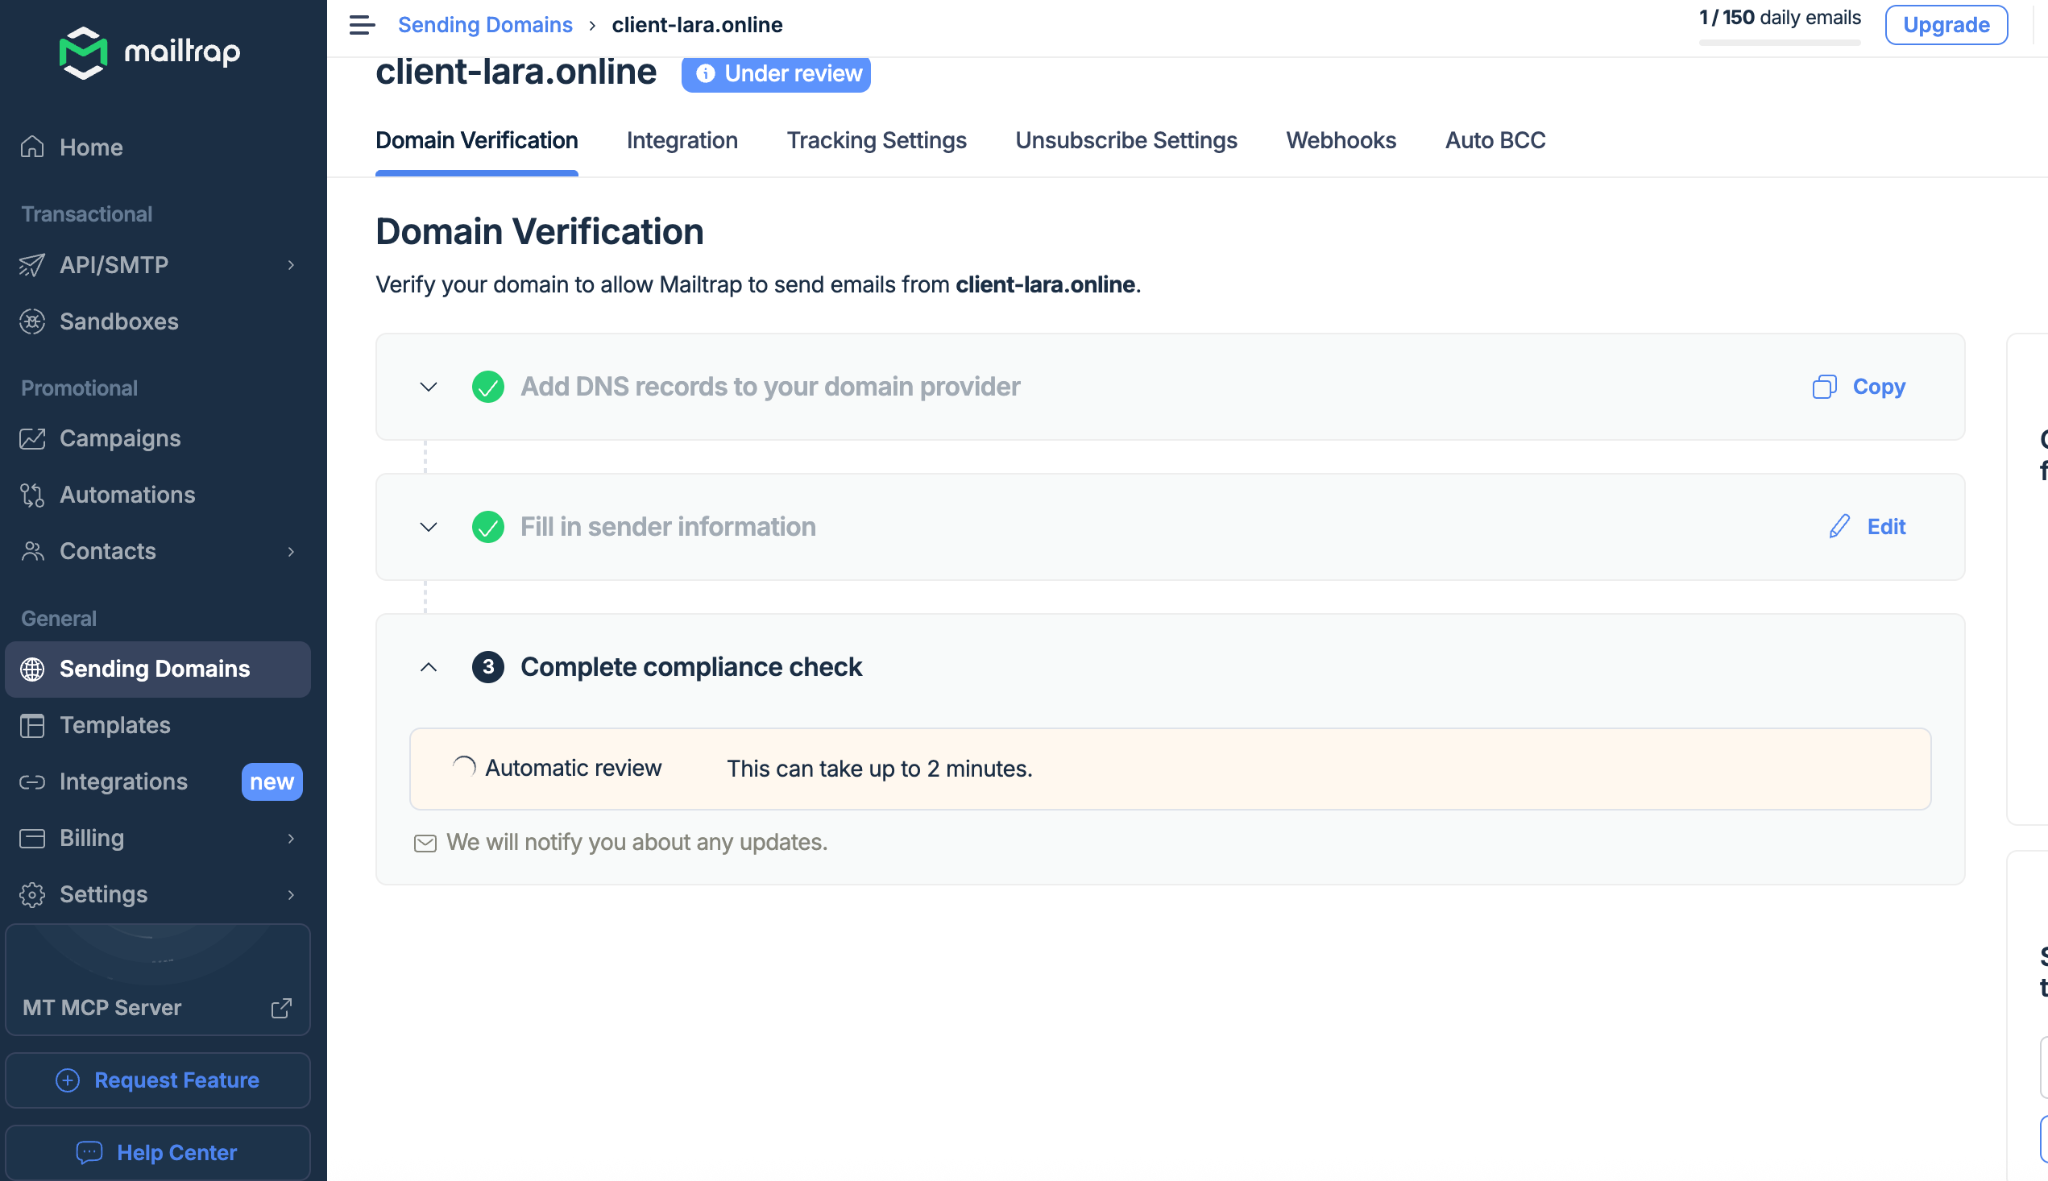
Submit **Mailtrap**button. After filling in the contact information you need to wait about 2 minutes, as indicated in **for the completion of the compliance check (Complete compliance check).**
1.11 If **Mailtrap** deems that the information is insufficient and additional information is required, a **Fill in Compliance Form.** button will appear. Click this button and complete the form.

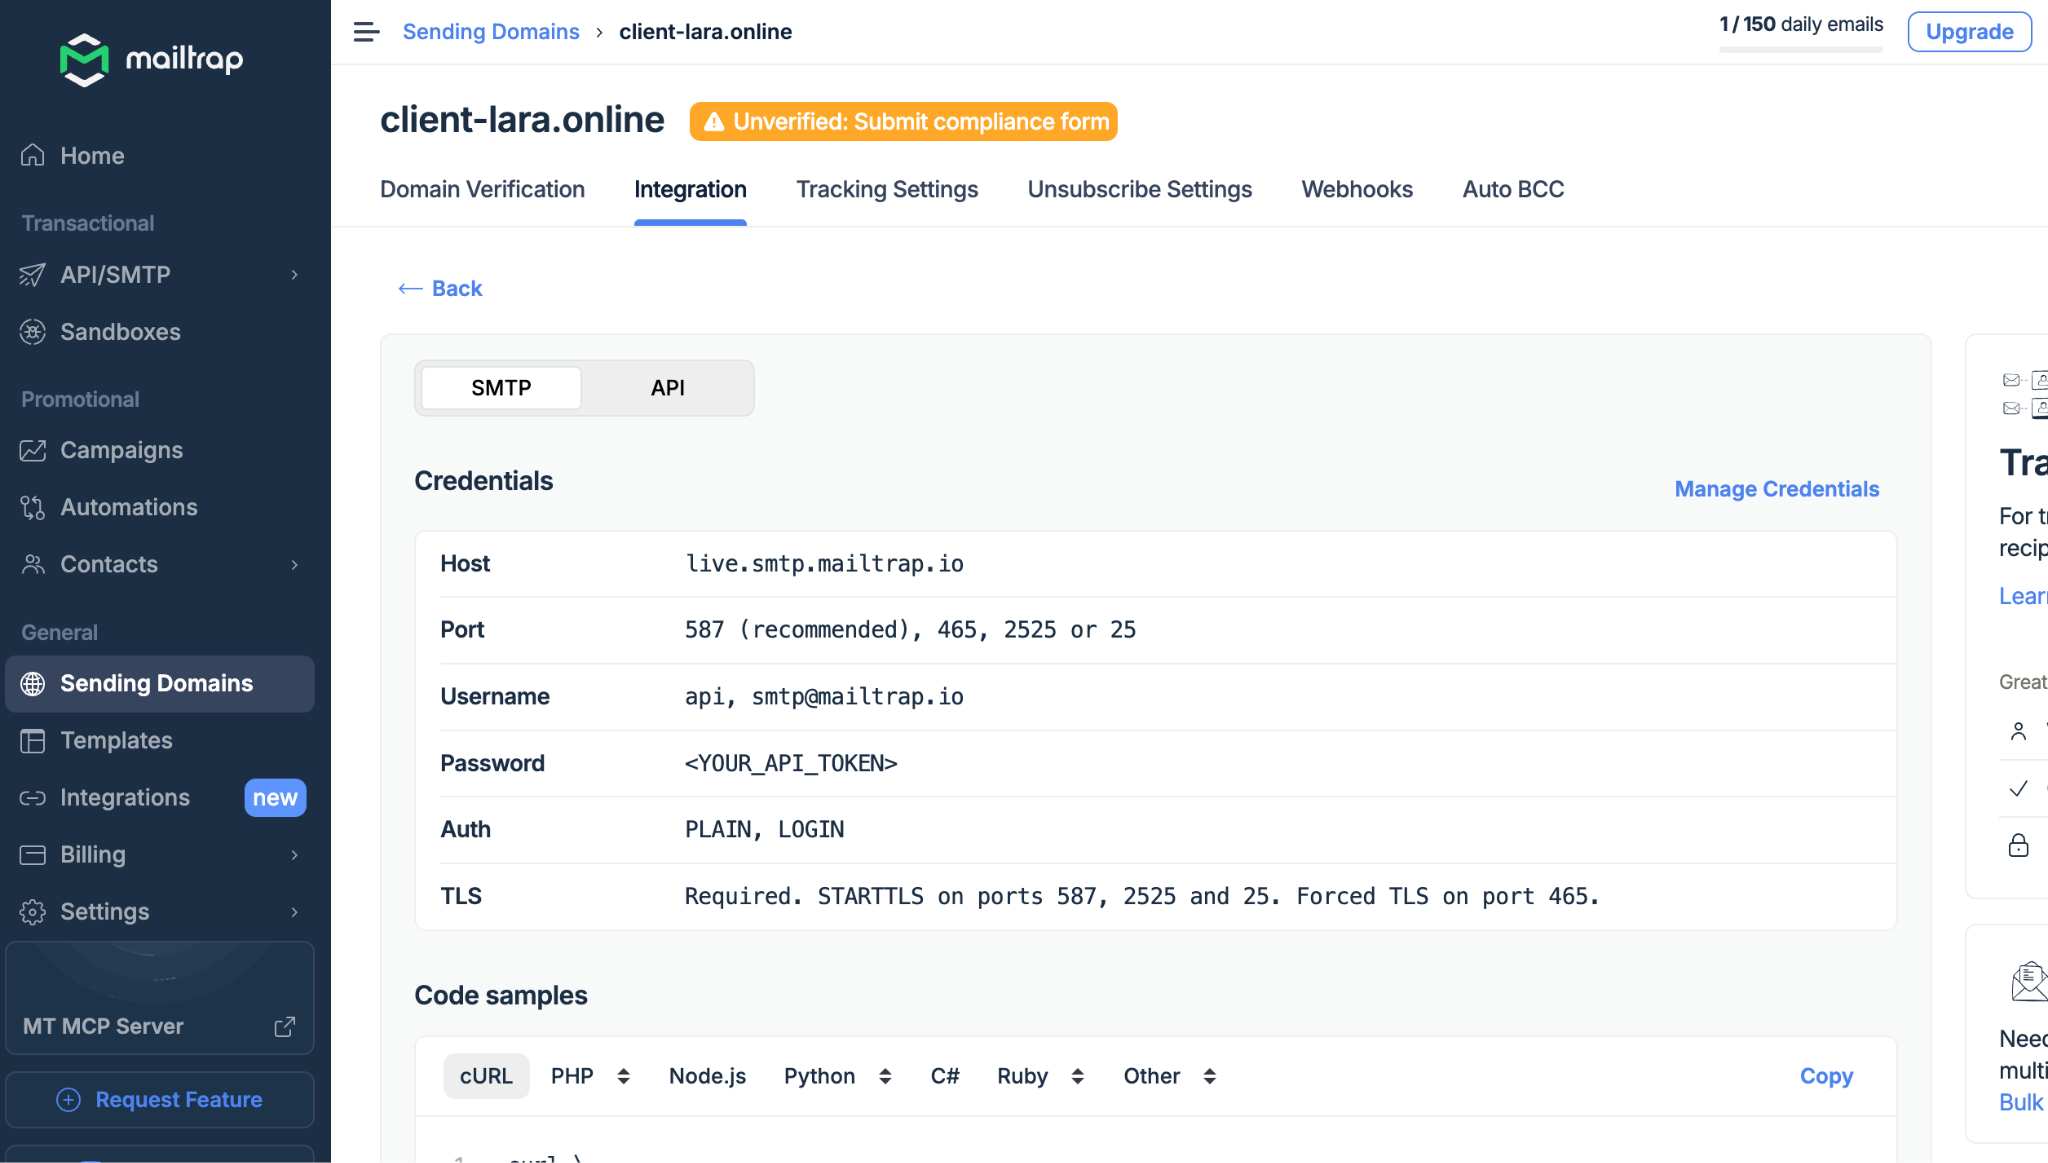
1.12 After successful verification go to the **Integration** tab and select the **Transactional Stream**type. If a **Create a token**button appears, click it. A window with the generated token will open — save it, you will need it to configure SMTP in your admin panel.

1.13 SMTP setup in the admin panel:
* Go to the admin panel: **Settings → SMTP Settings.**
* In the **Host:** enter the value from **Mailtrap (*****Host*****)**, for example**: live.smtp.mailtrap.io.**
* In the **Port:** enter the value from **Mailtrap (*****Port*****)**, it is recommended to use **587.**
* In the **Username**: enter one of the values from **Mailtrap (*****Username*****)**, for example **api** or [**smtp@mailtrap.io**](mailto:smtp@mailtrap.io)**.**
* In the **Password**: enter the generated **Mailtrap token.**
* In the **Sender address:** specify **noreply\@YOURDOMAIN.**
* In the **Sender name**: you can specify any name convenient for you.
1. TurboSMTP
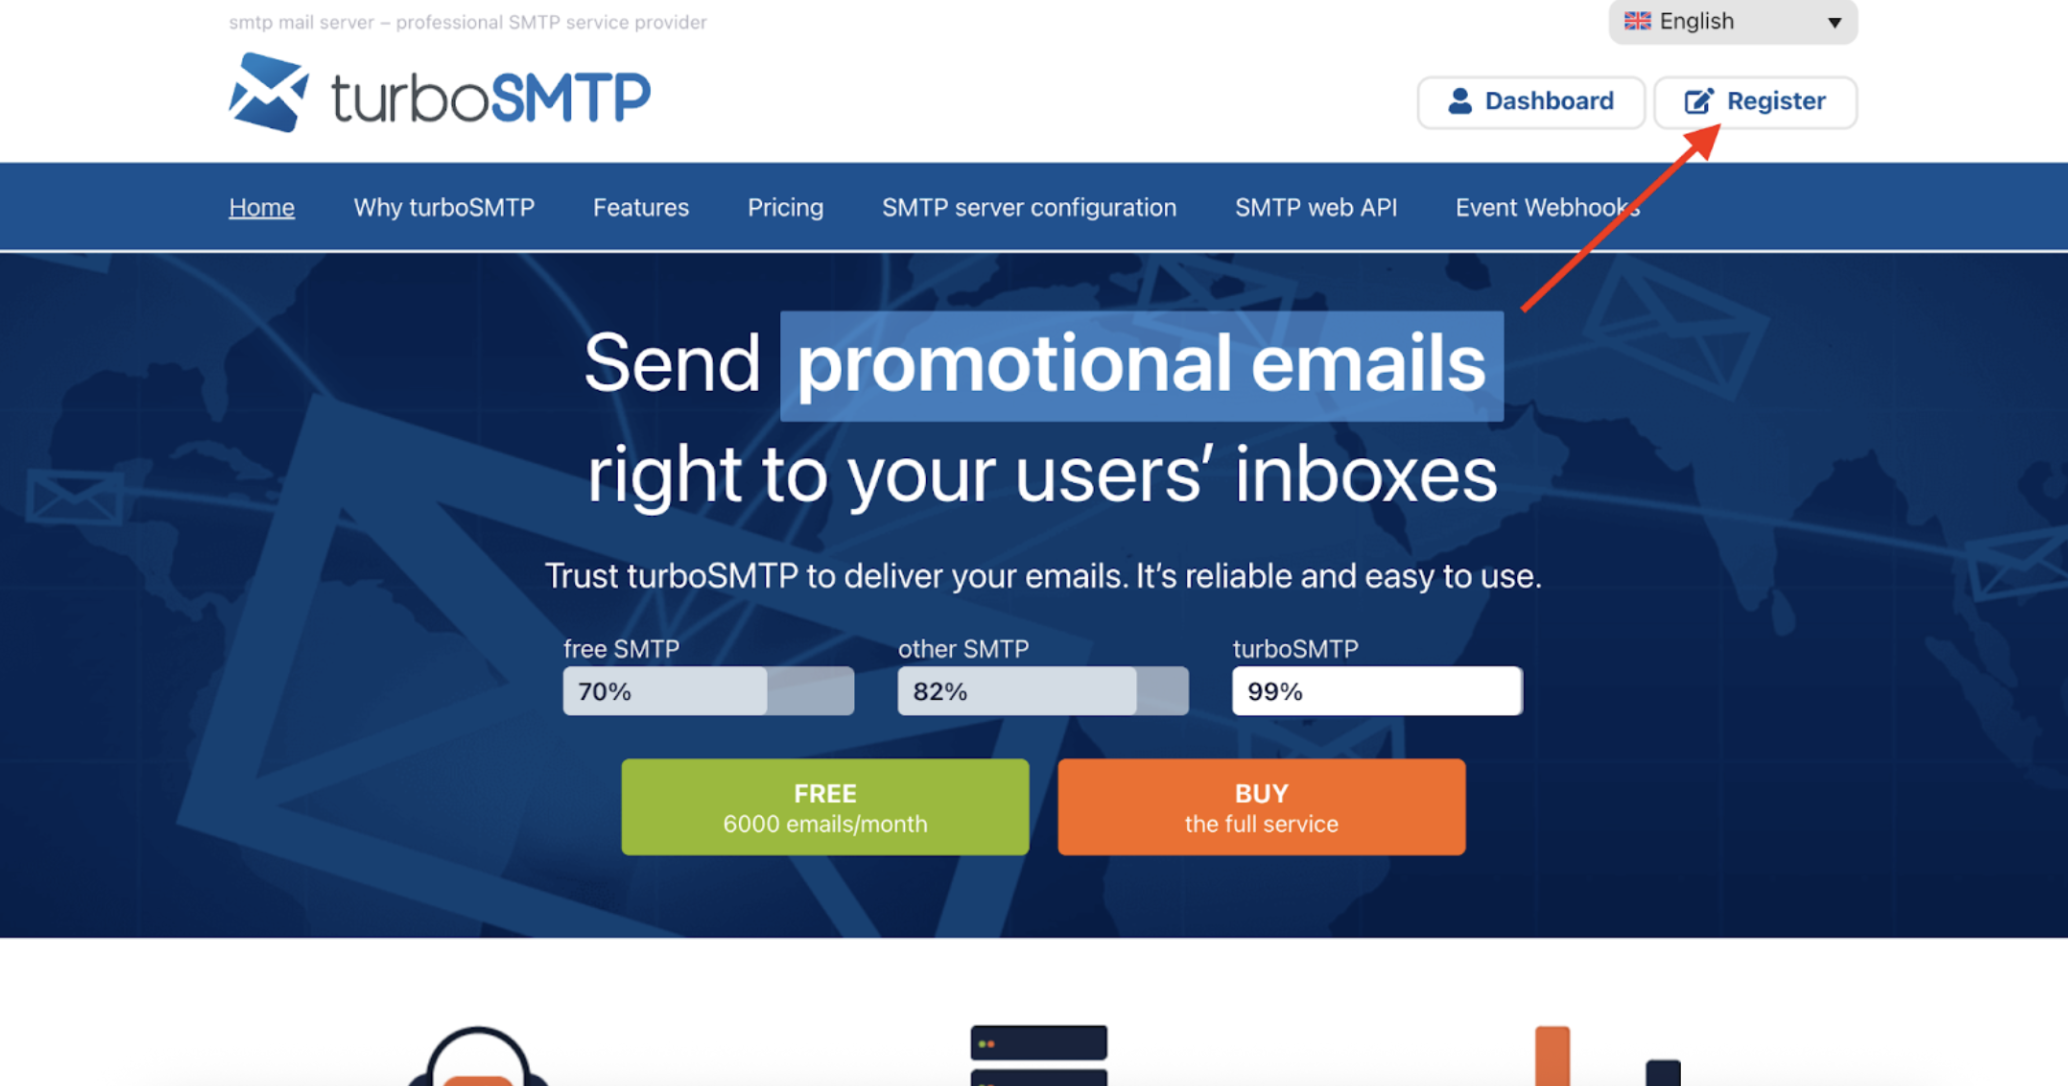
2.1 Registering with **TurboSMTP.** Go to the official website[ **https://serversmtp.com/**](https://serversmtp.com/)**.** To register a new account or sign in to an existing one click the **Register.**
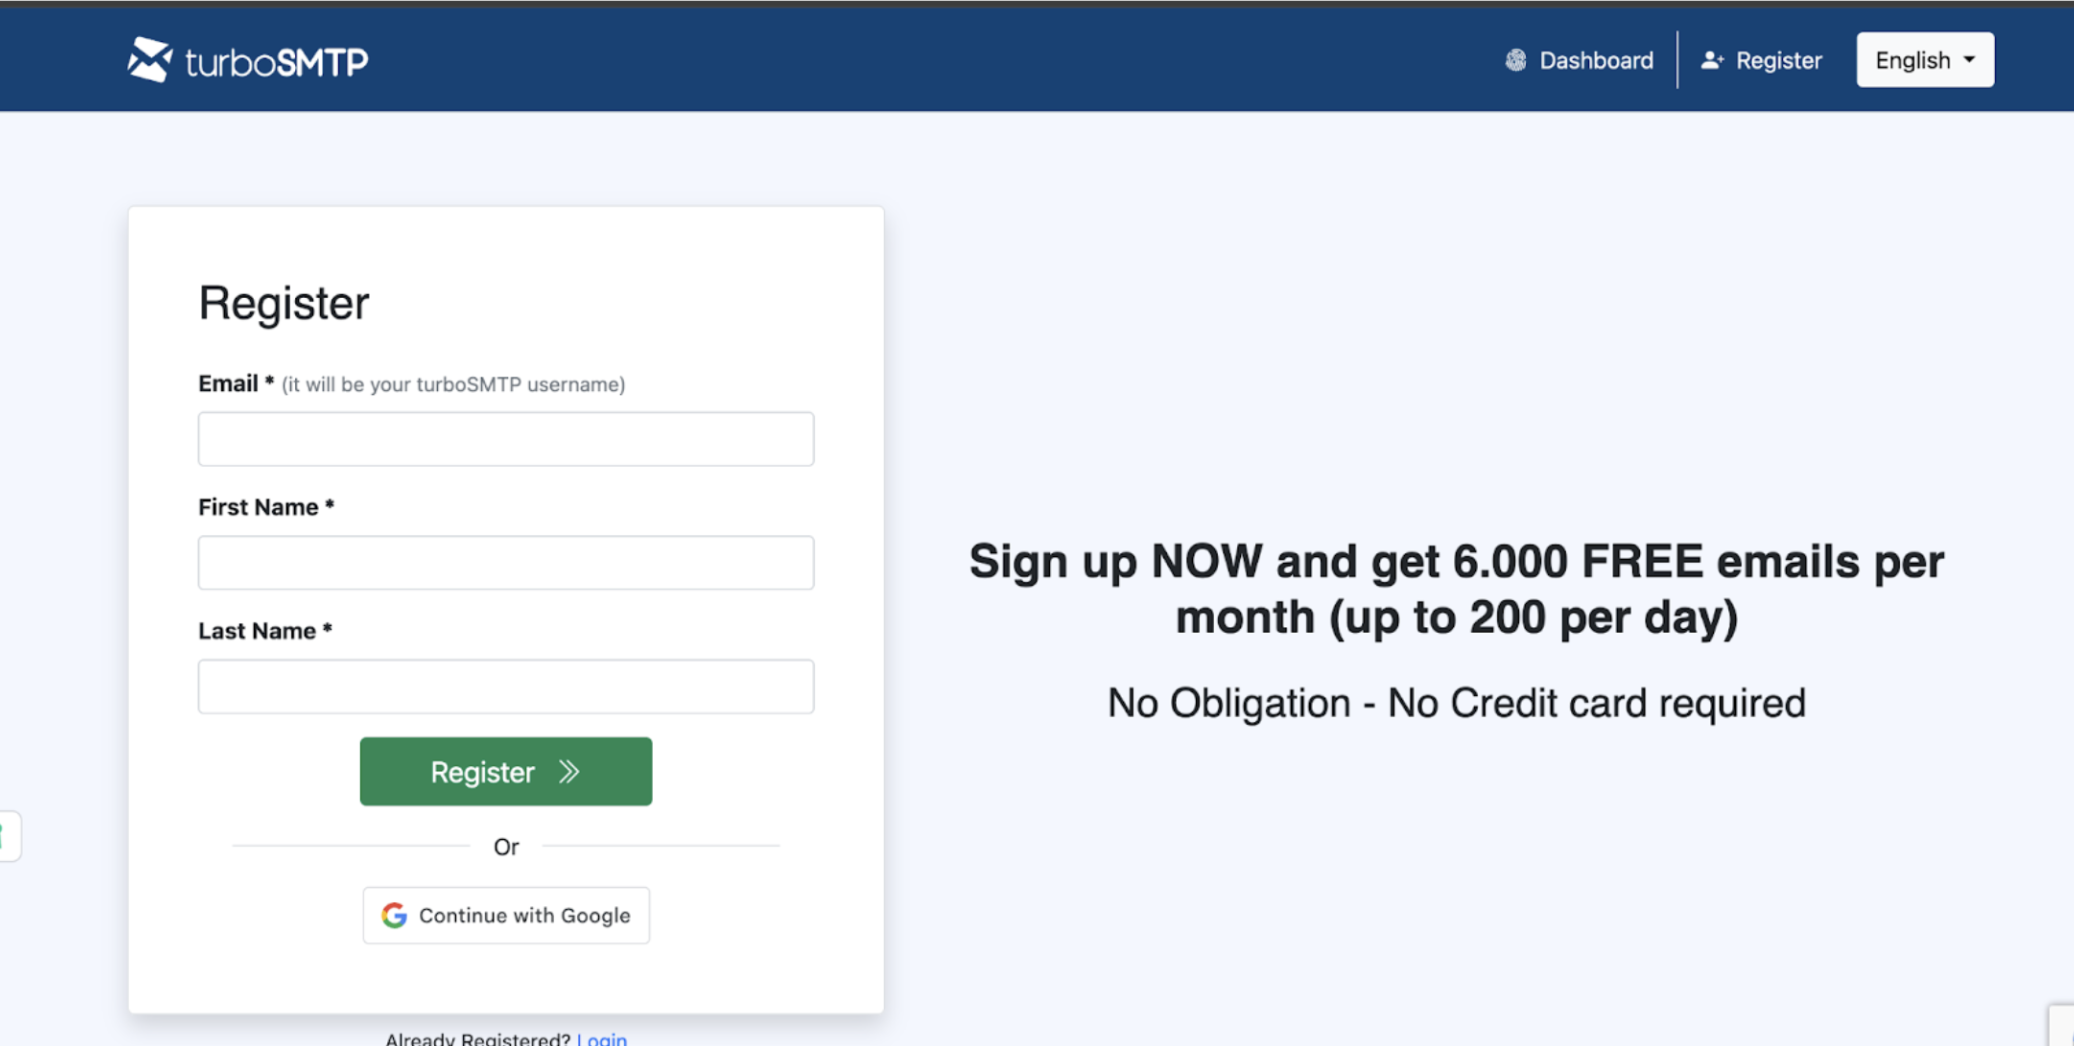
2.2 For registration you can sign in via **Google** or enter your email, first name and last name, then click the **Register.**
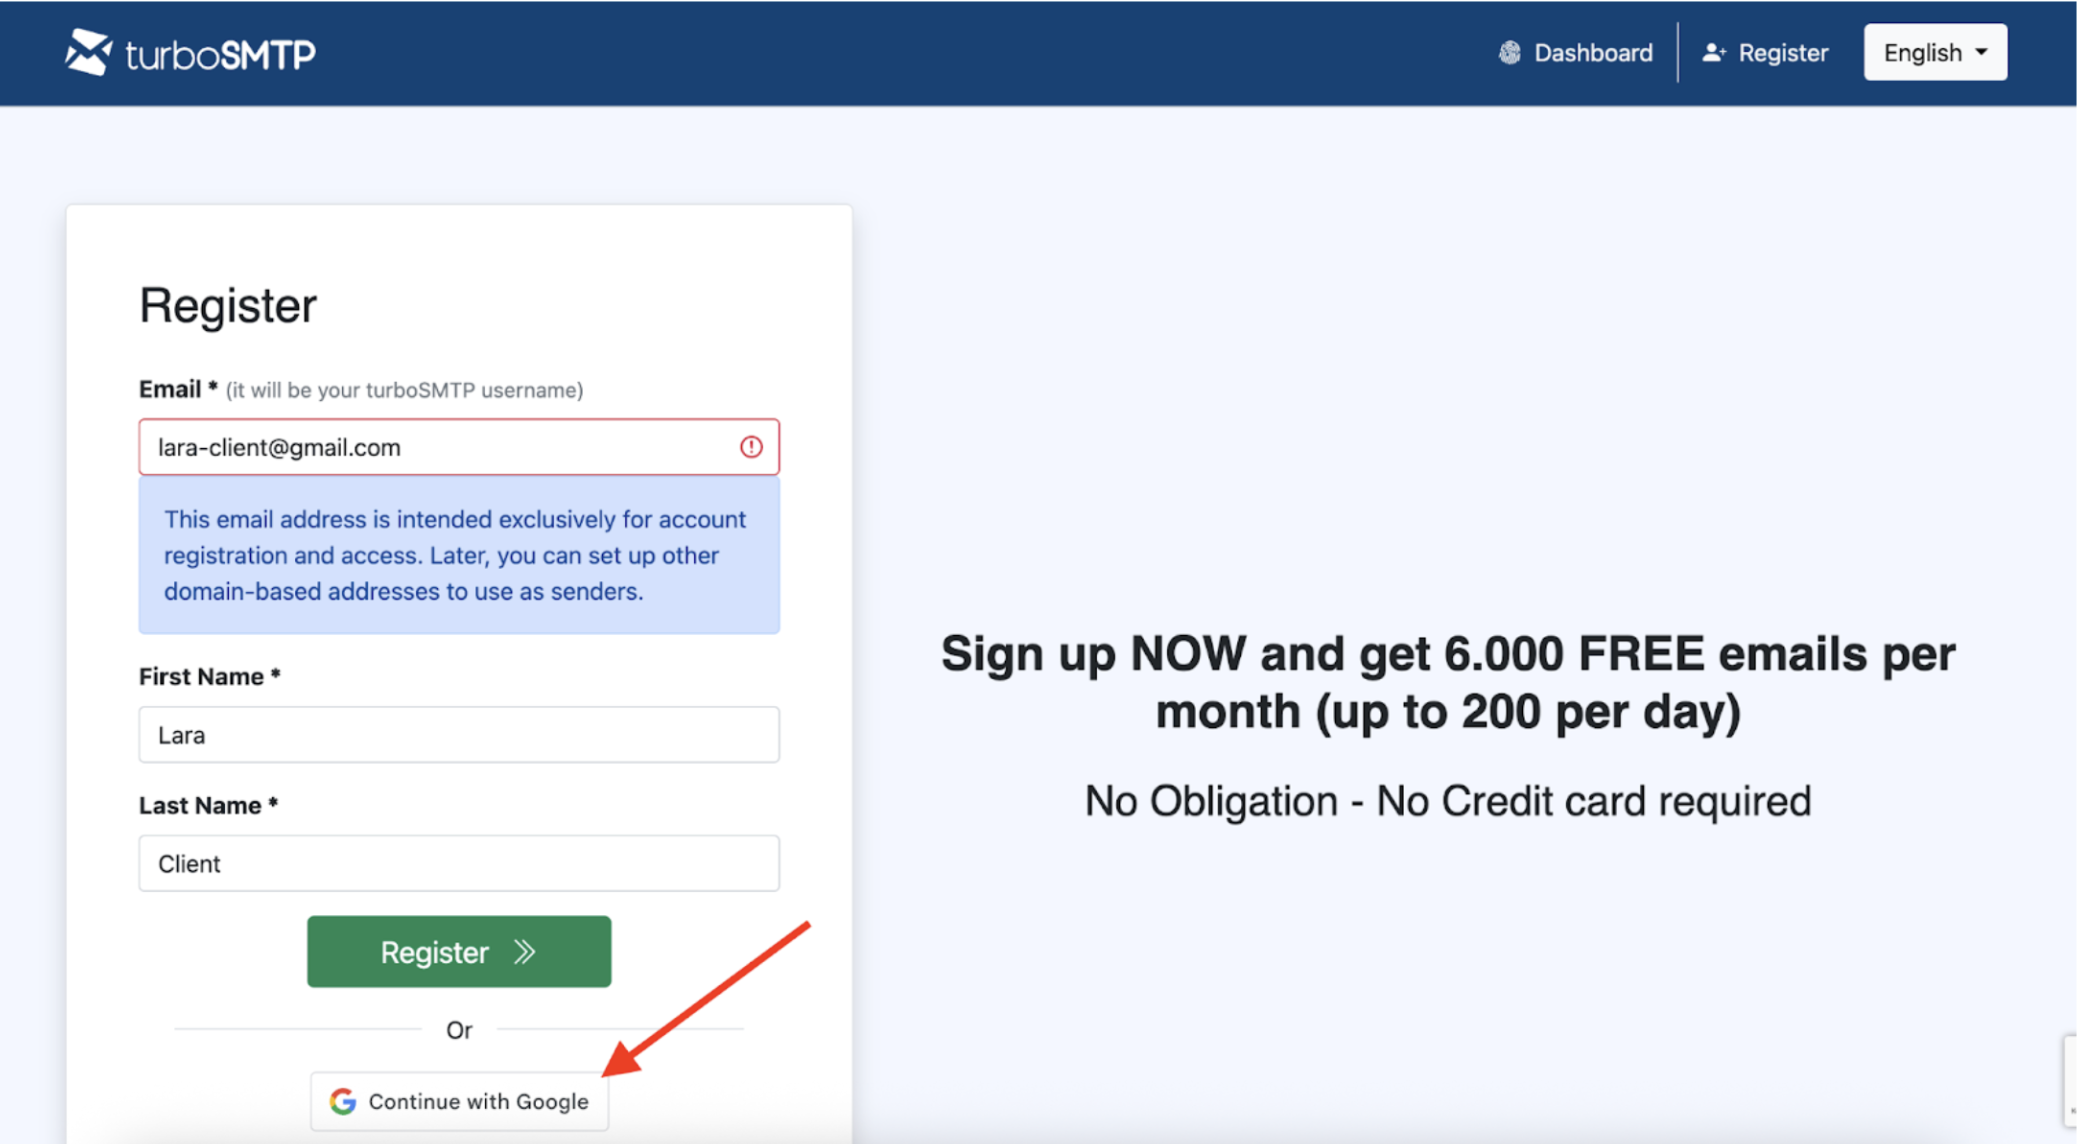
button. **2.3 If you receive the notification:**“This email address is intended exclusively for account registration and access. Later, you can set up other domain-based addresses to use as senders.” **, try signing in via**
Google. **Google** 2.4 After successful authentication via **Register.**
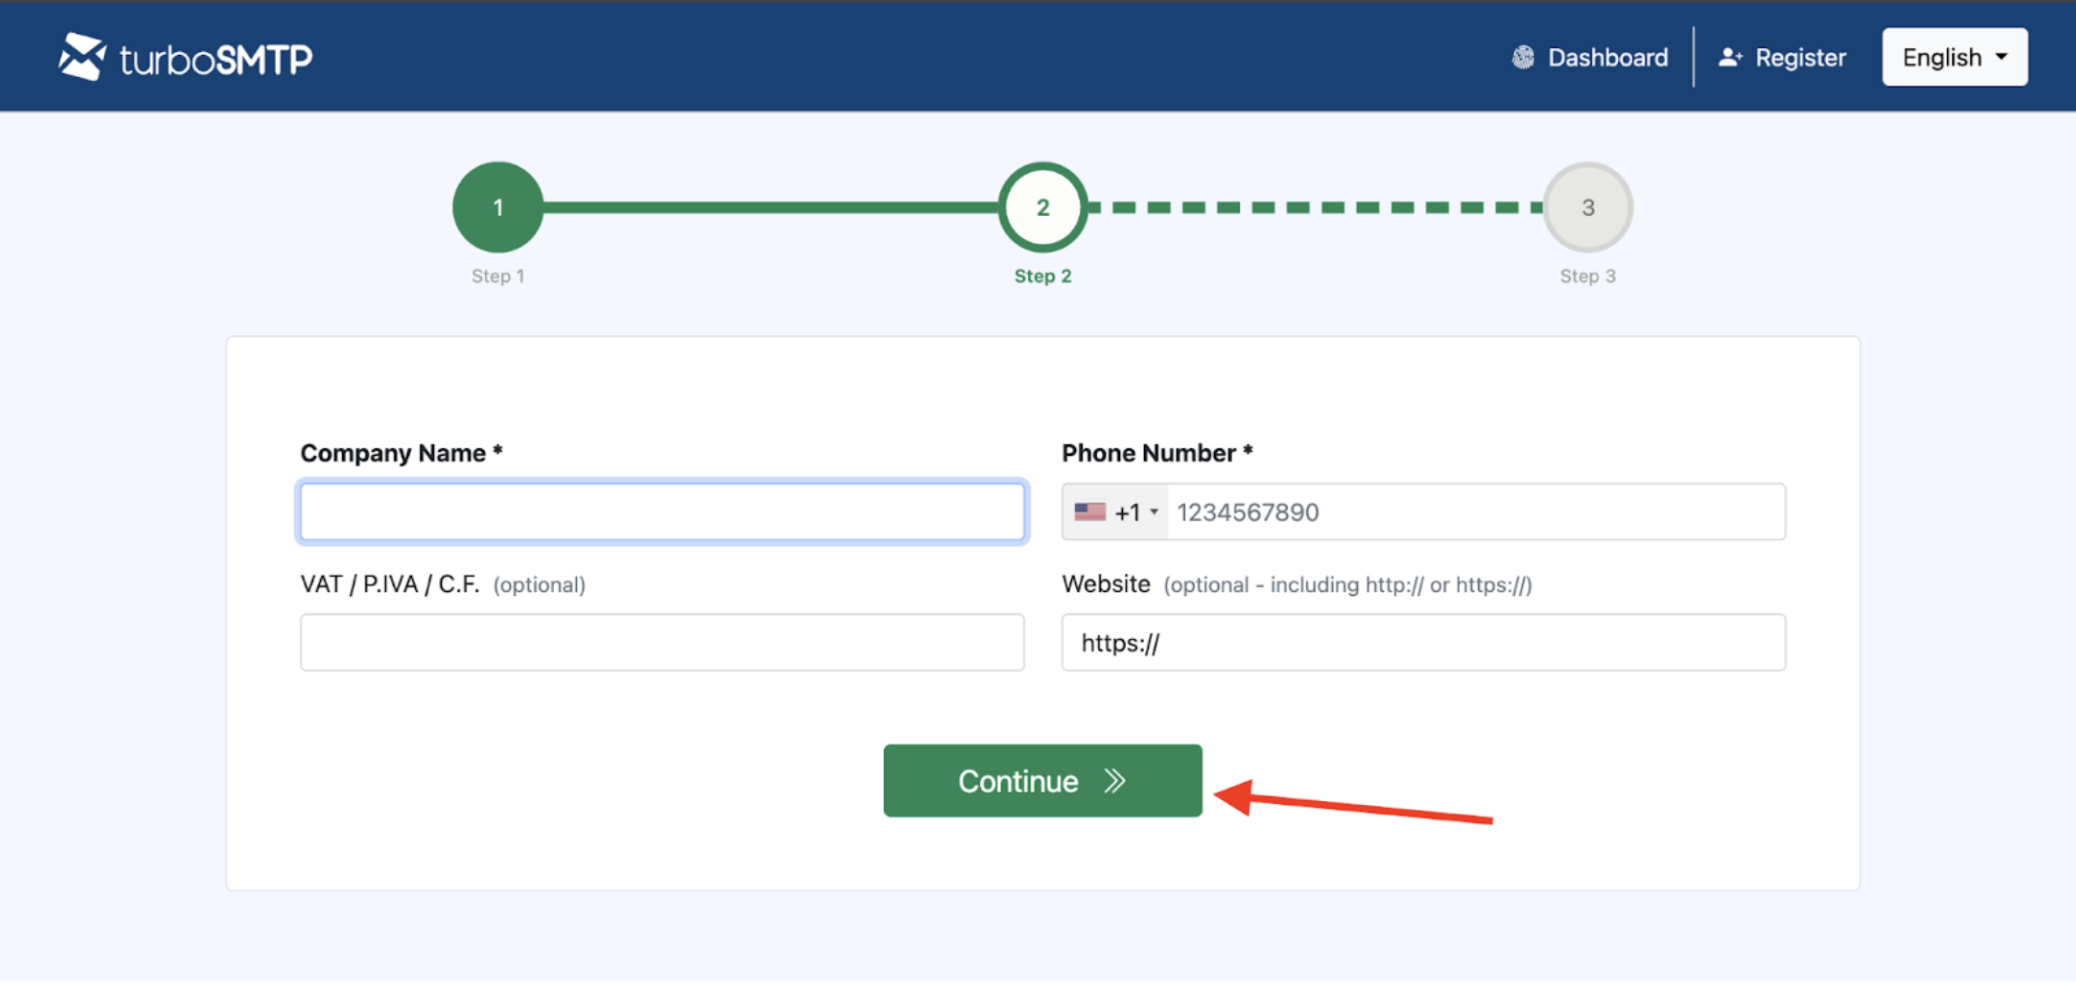
fill in the form with your email, first name and last name and click the **button.** and **2.5 In the second step of registration you need to fill in the required fields:**Company Name **Phone Number**
. After filling them in click the **Continue.**
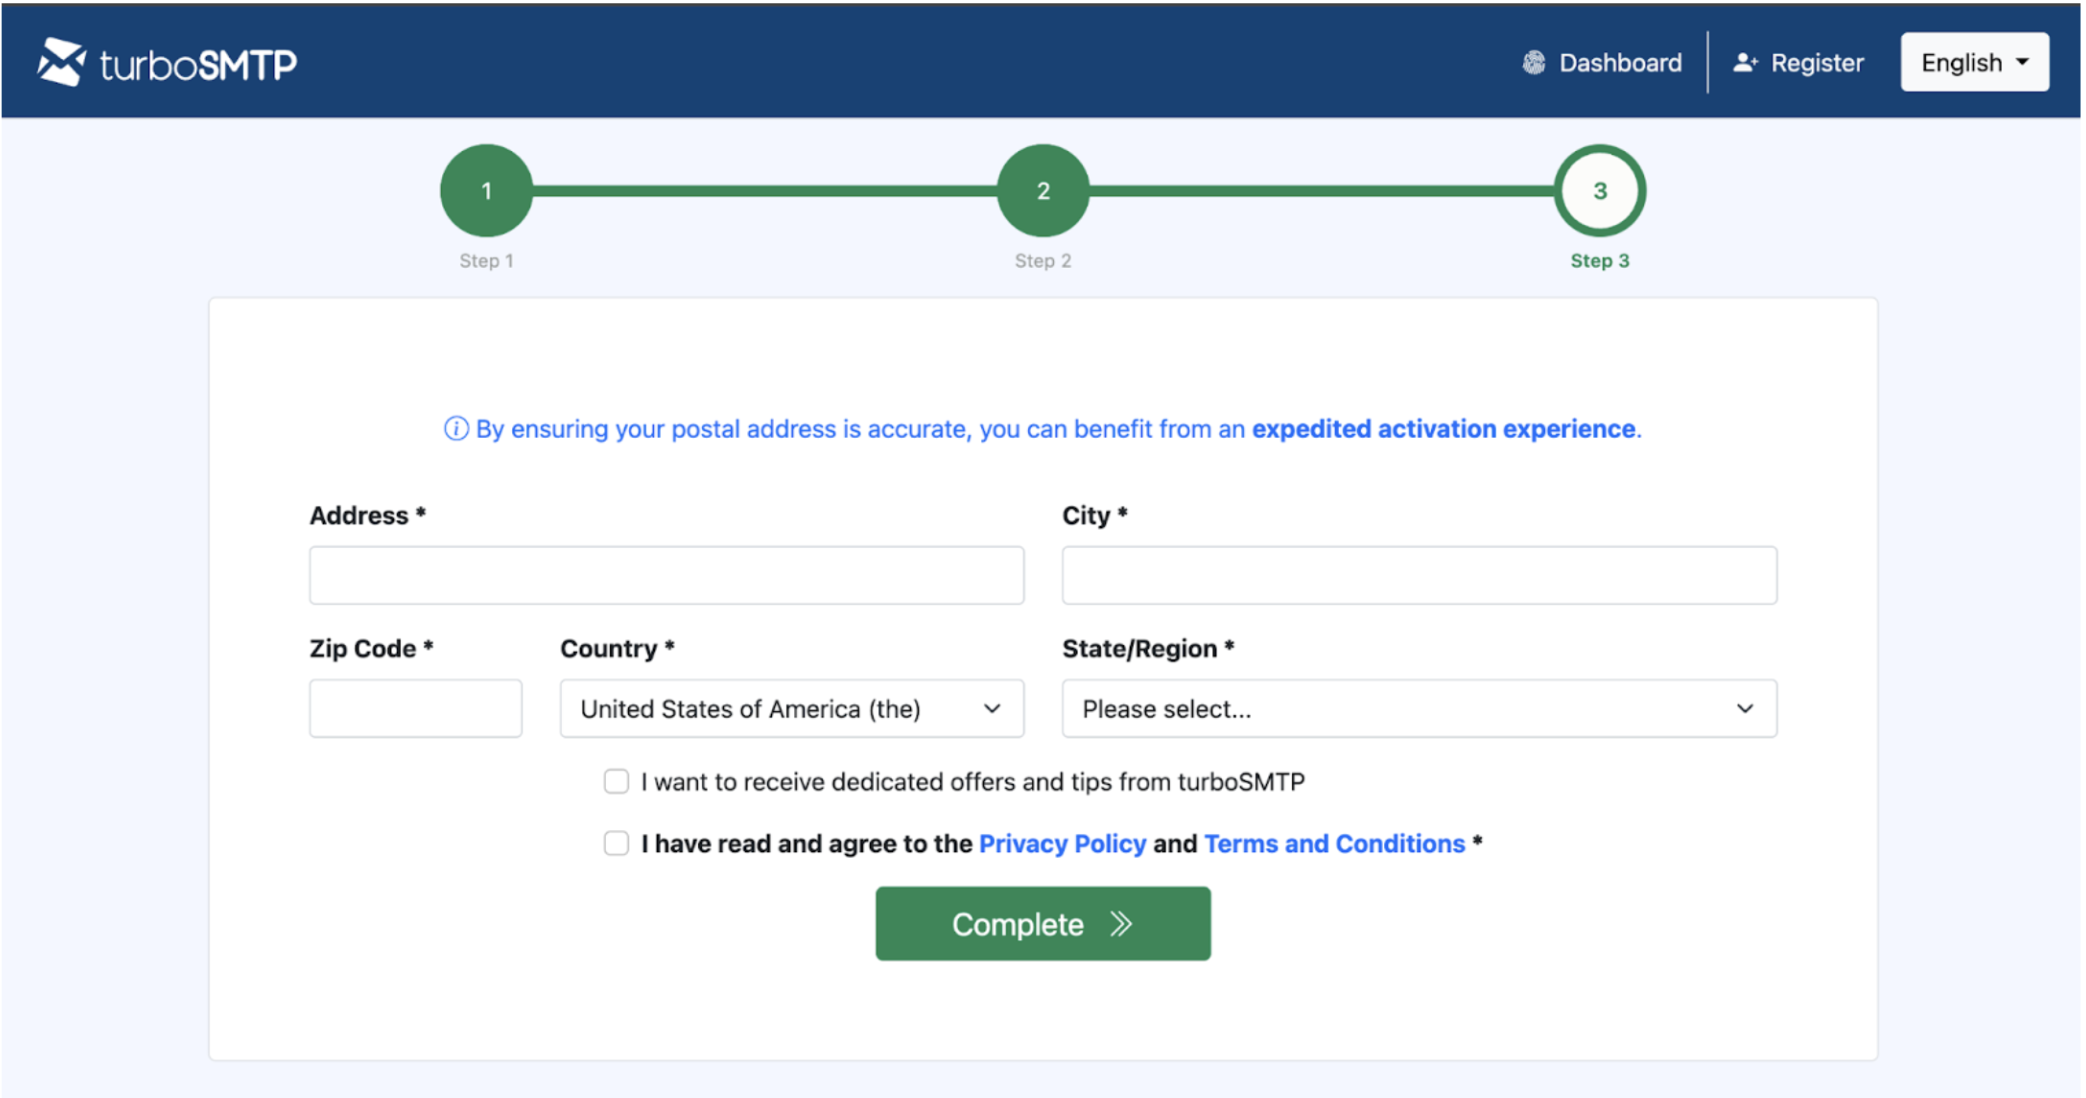
2.6 On the third step fill in the address information. After filling it in click the
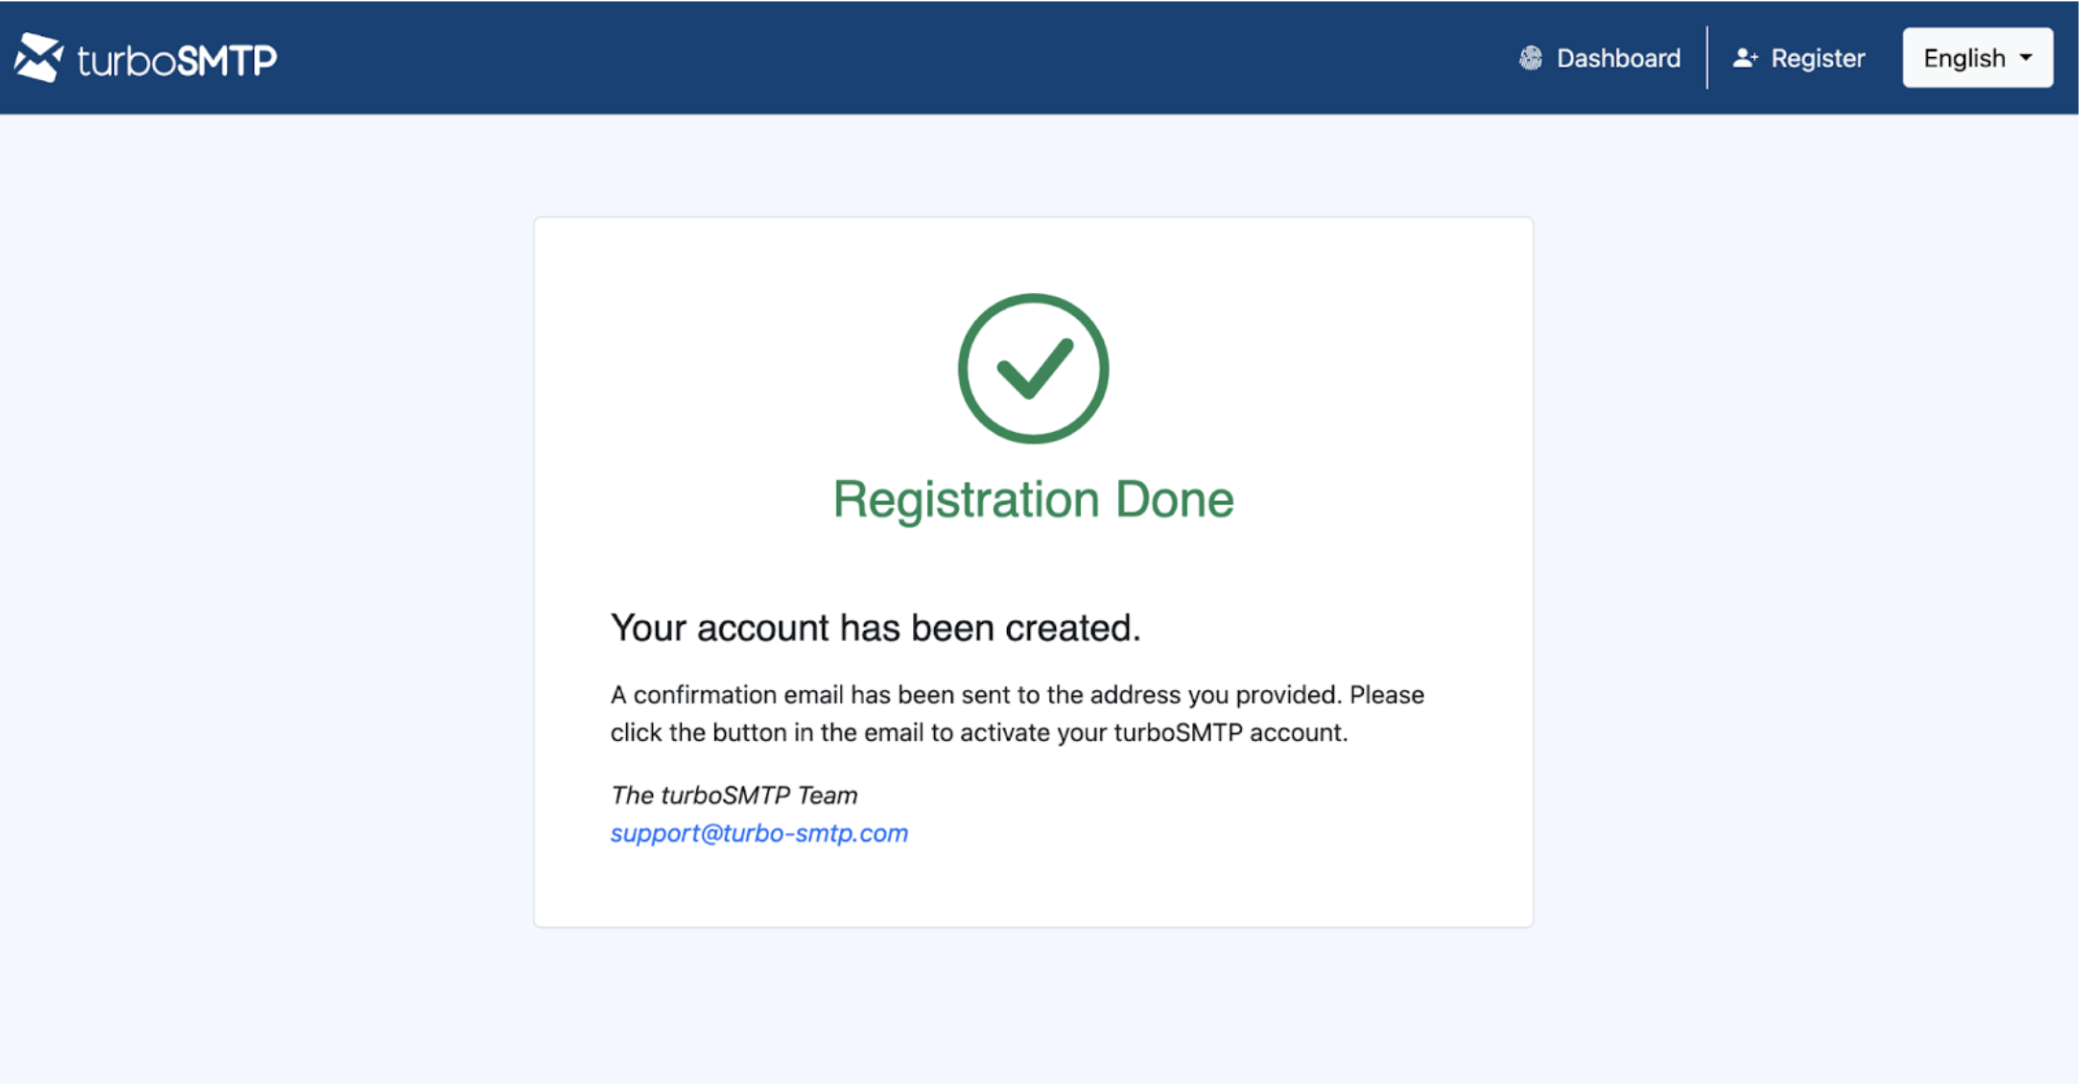
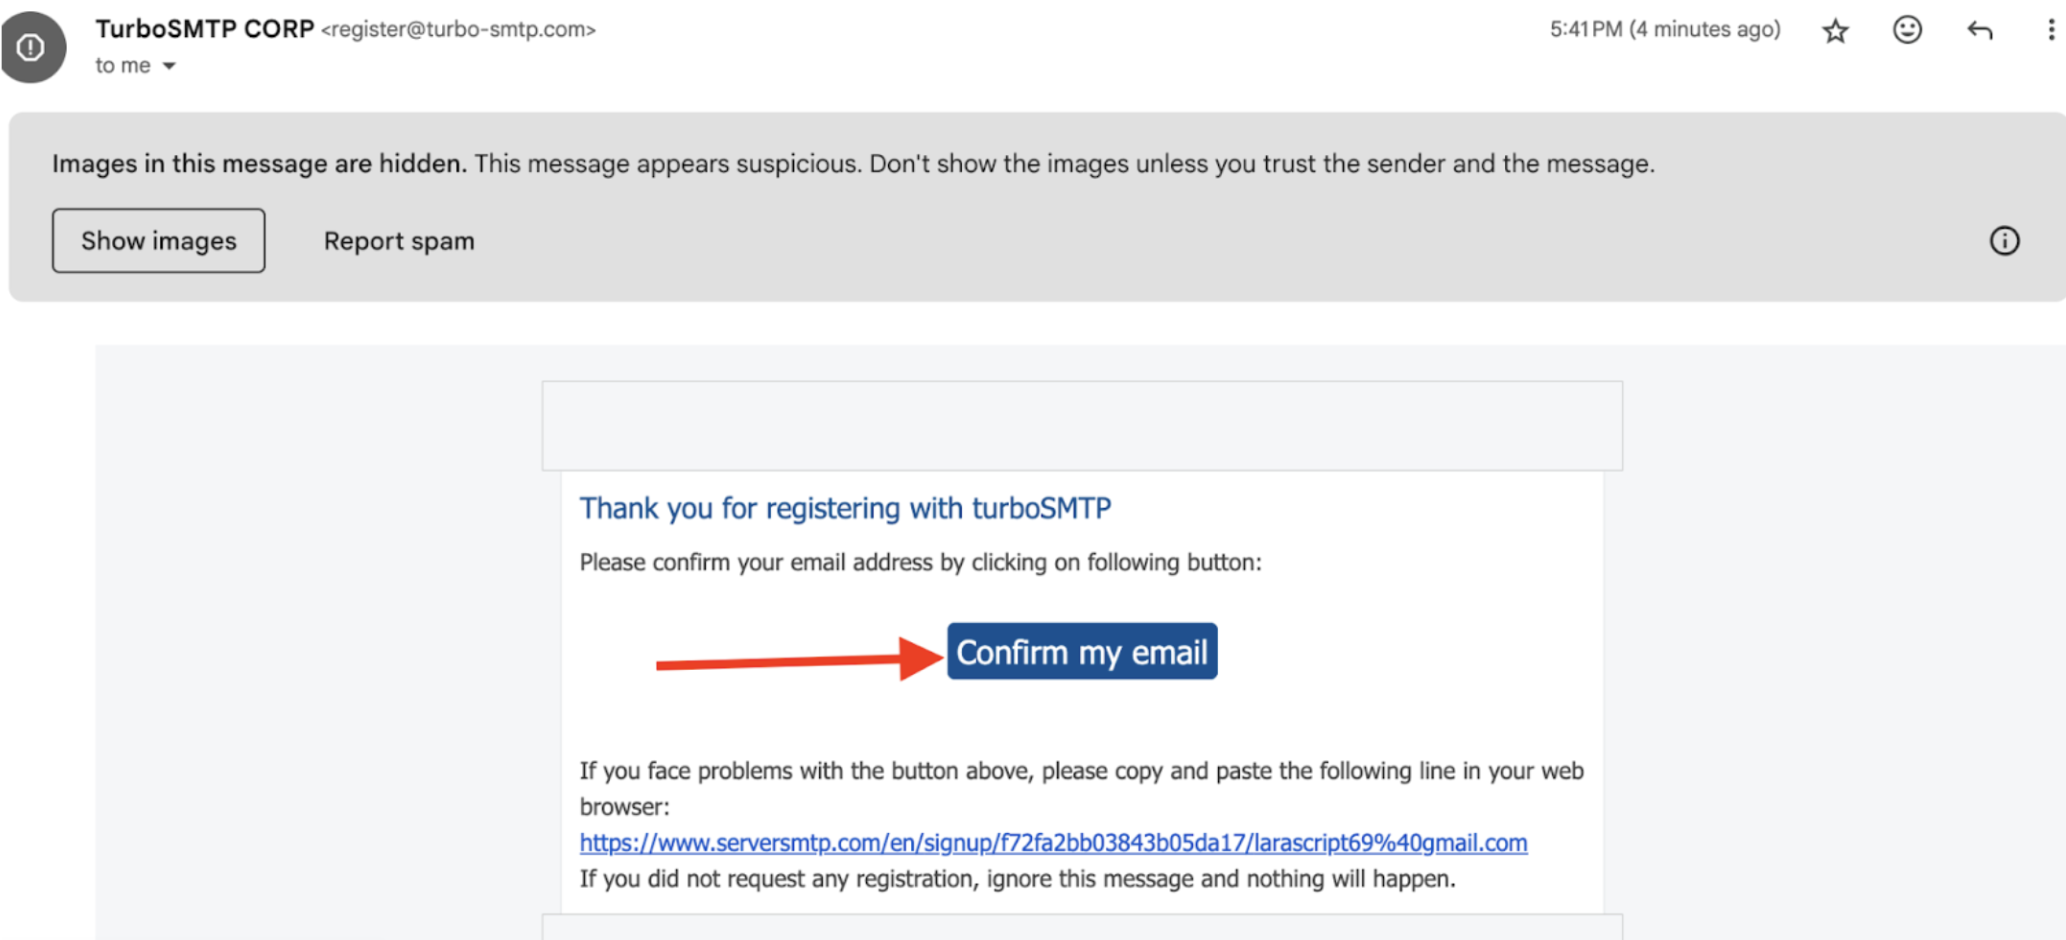
Complete. **2.7 After completing all the steps this window will appear.**You should receive an email to confirm your address — in the email click the
Confirm my email **button. After that you need to wait: a password for logging into the account will be sent to the email address you provided.**
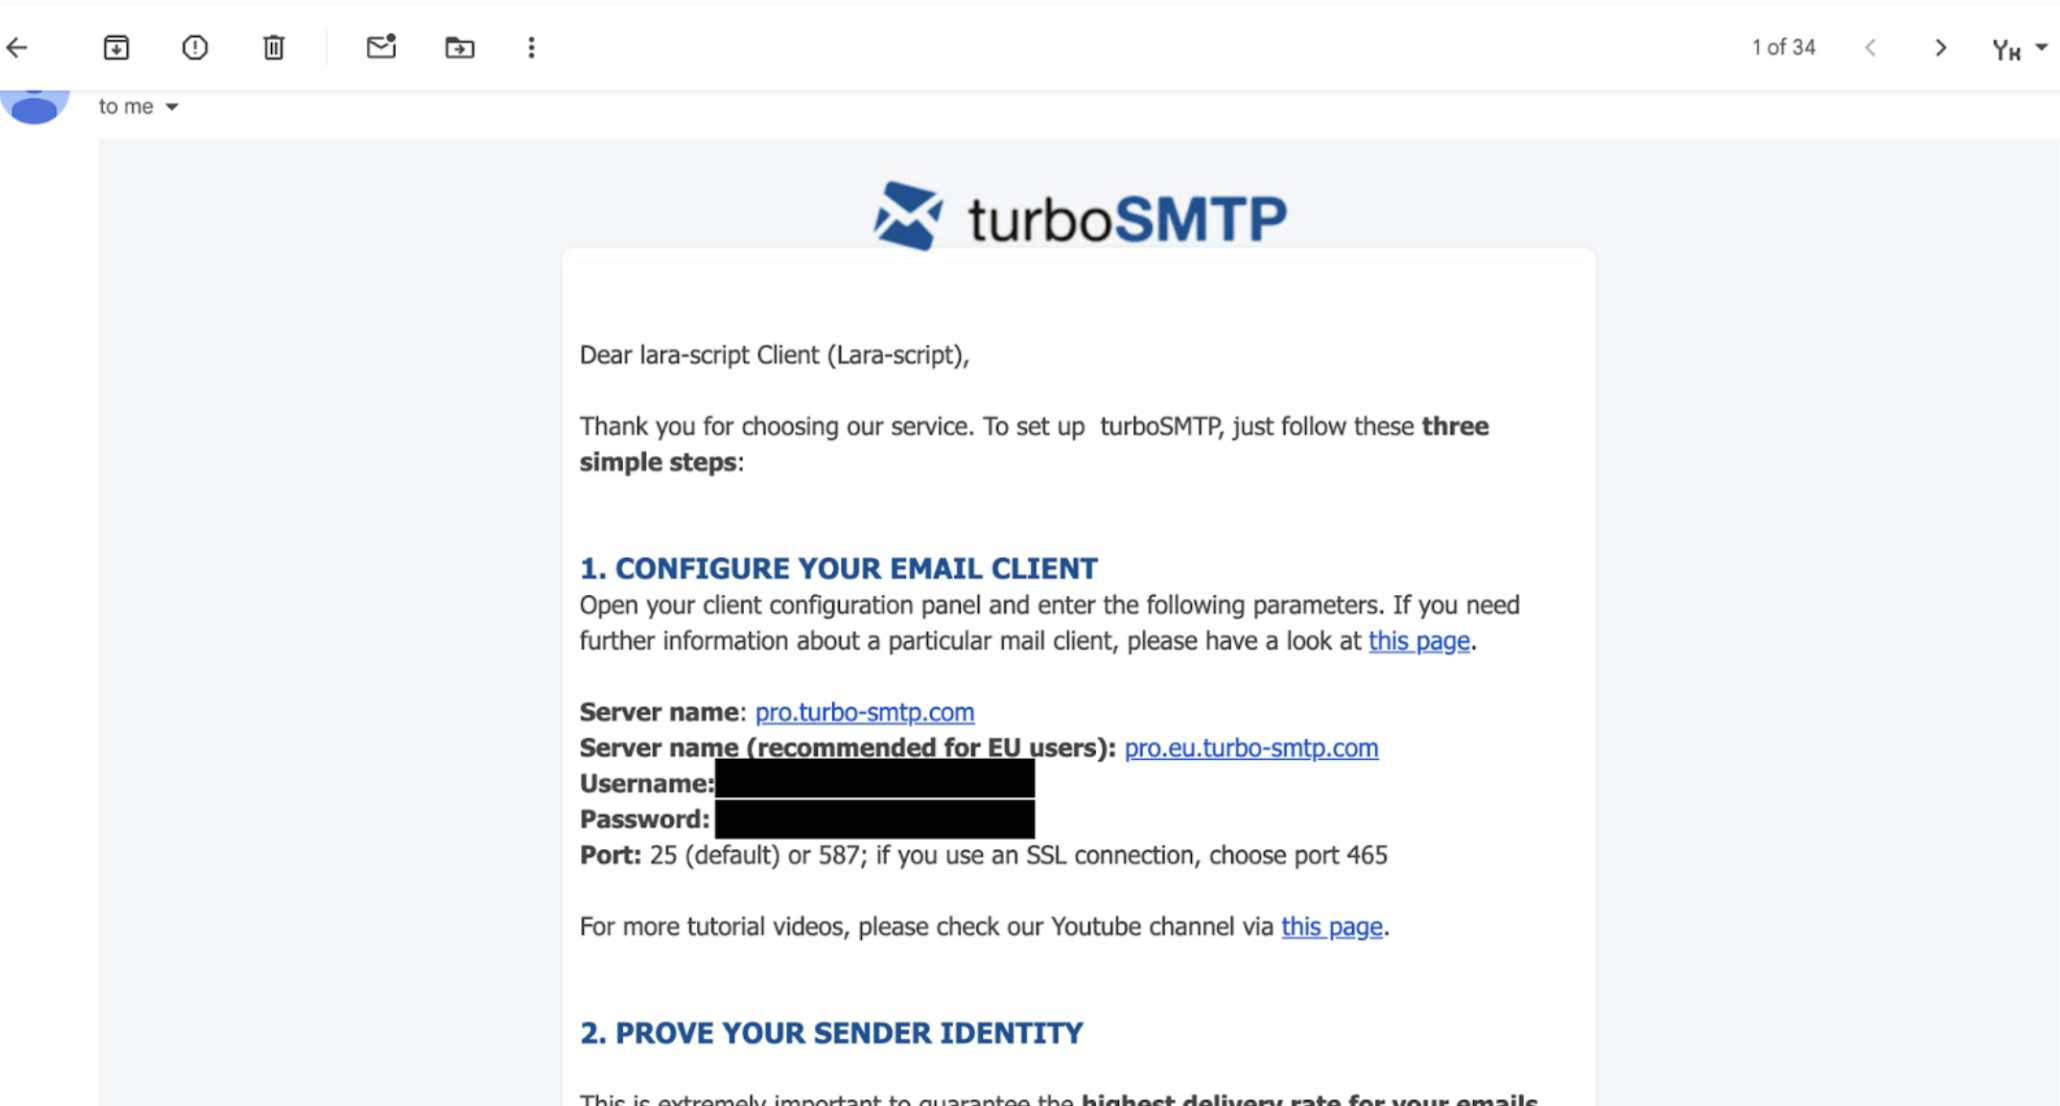
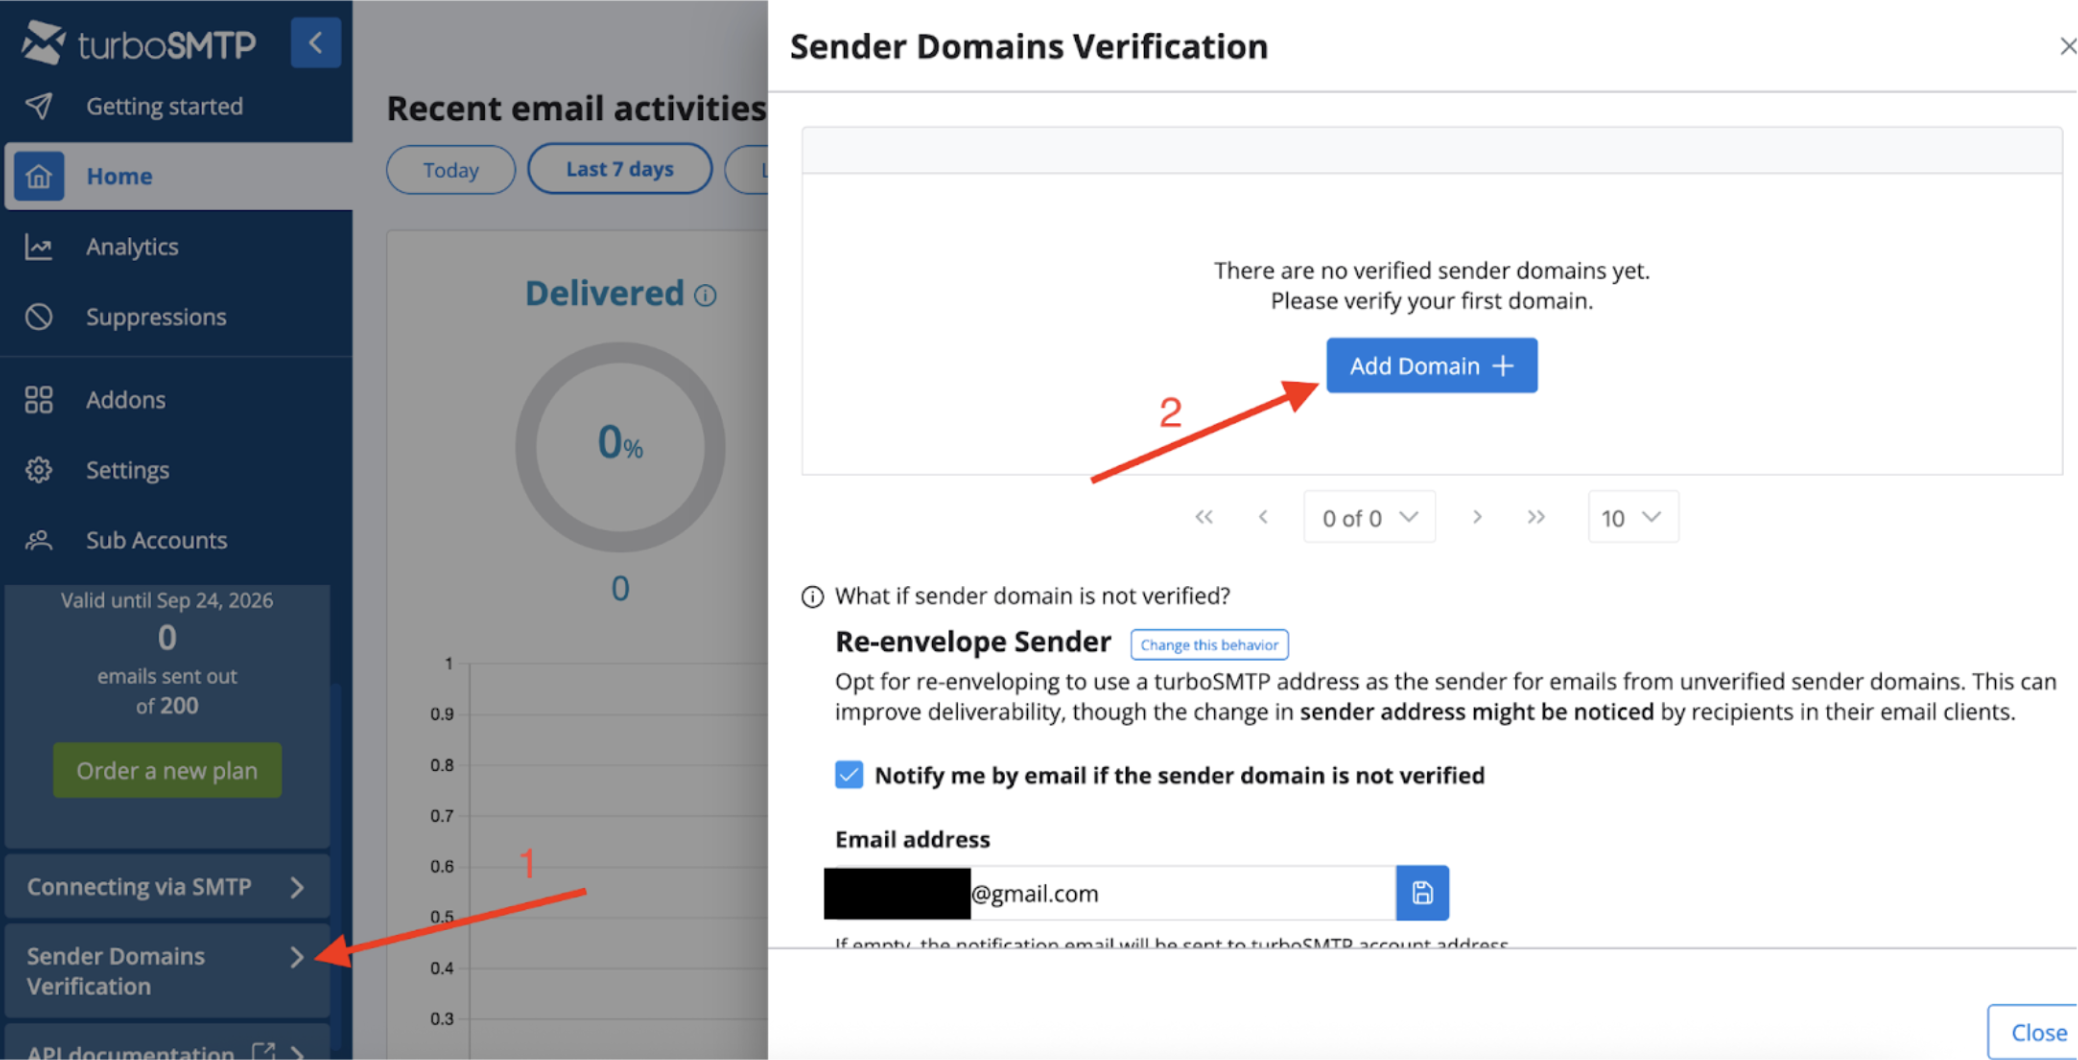
2.8 After that you should receive a second email with the keys. To log into the account use the **Username and Password** values from the email. **2.9 The next step is domain verification. After logging into the dashboard click the** Sender Domains Verification.**.**
In the window that opens a button will appear on the right **Add Domain**
— click it
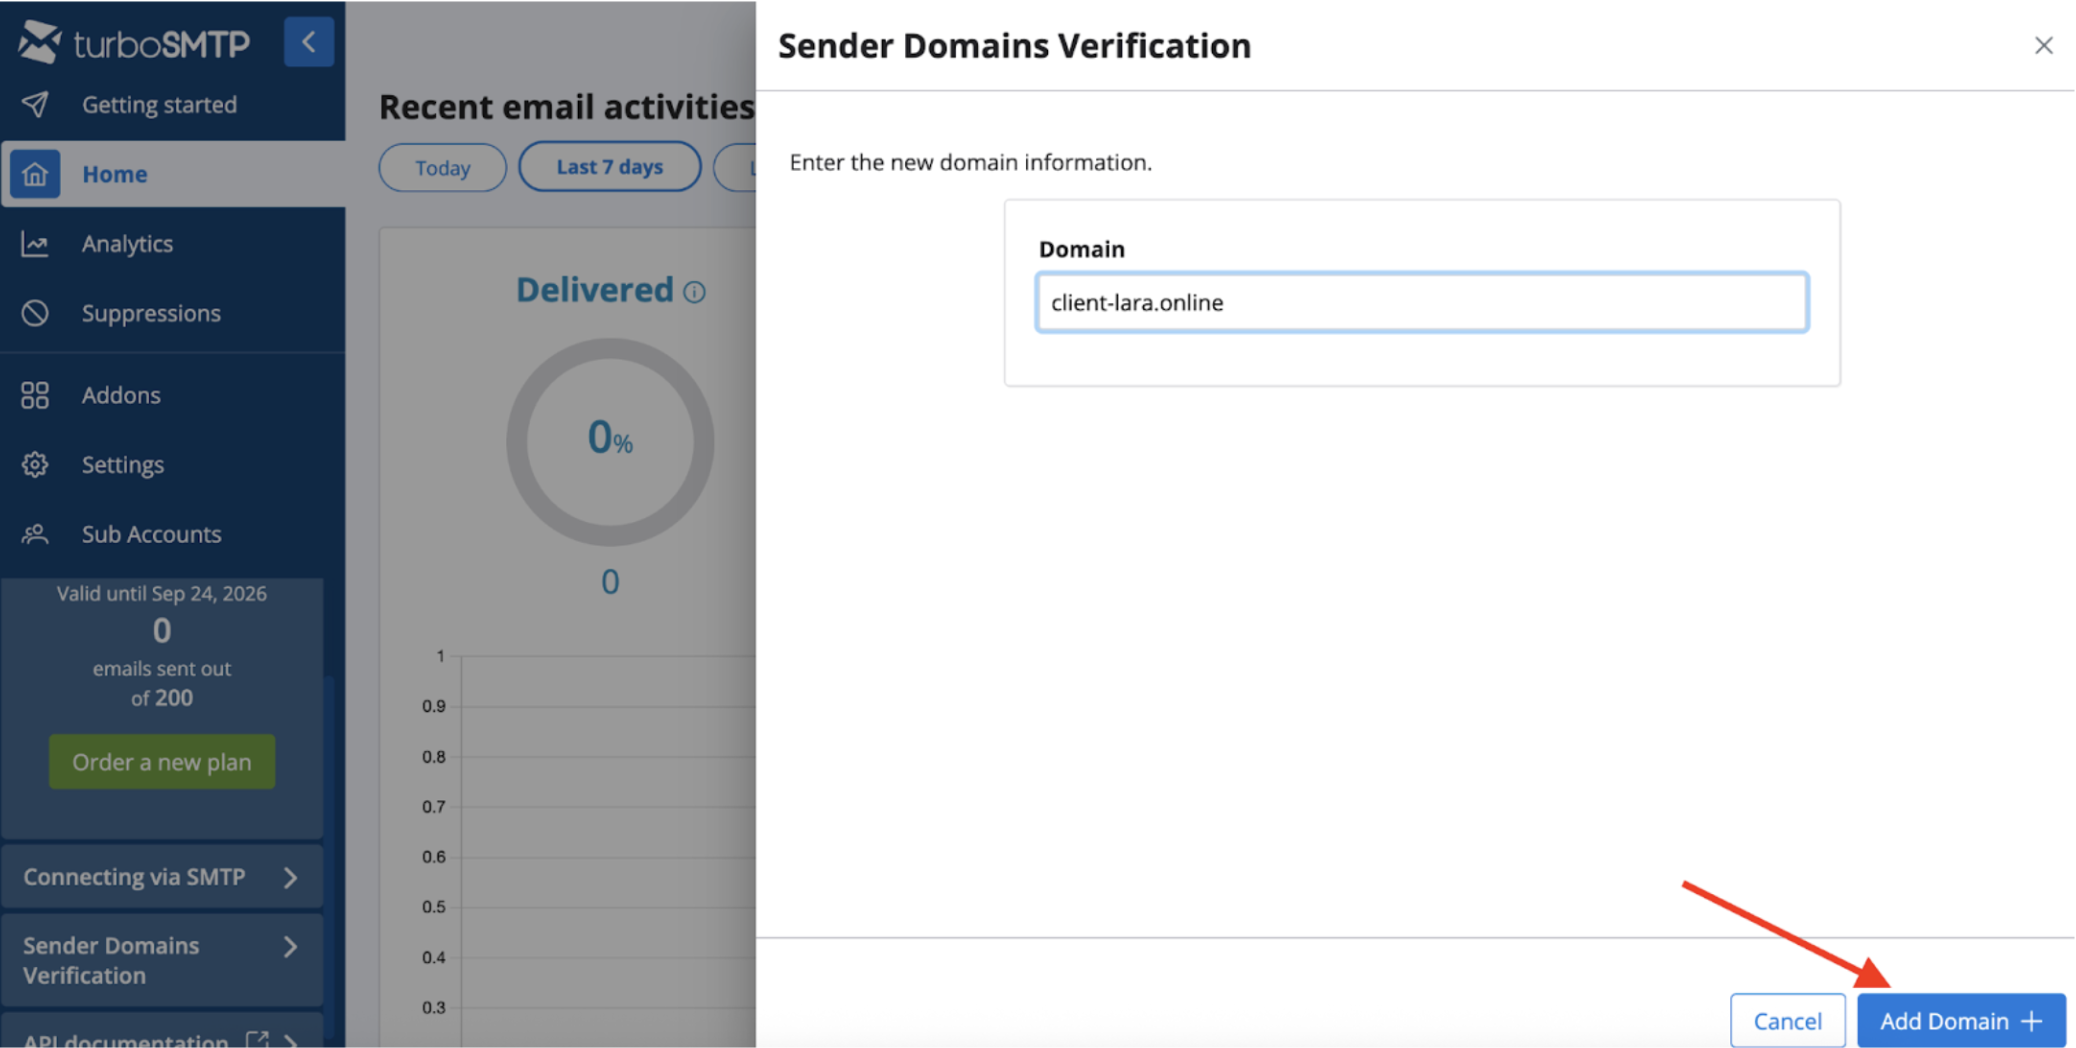
2.10 Specify the domain from which you plan to send emails and click the **Cloudflare**account where the domain is registered and select the appropriate domain to add the DNS records.
Click the DNS menu to add the required DNS records.
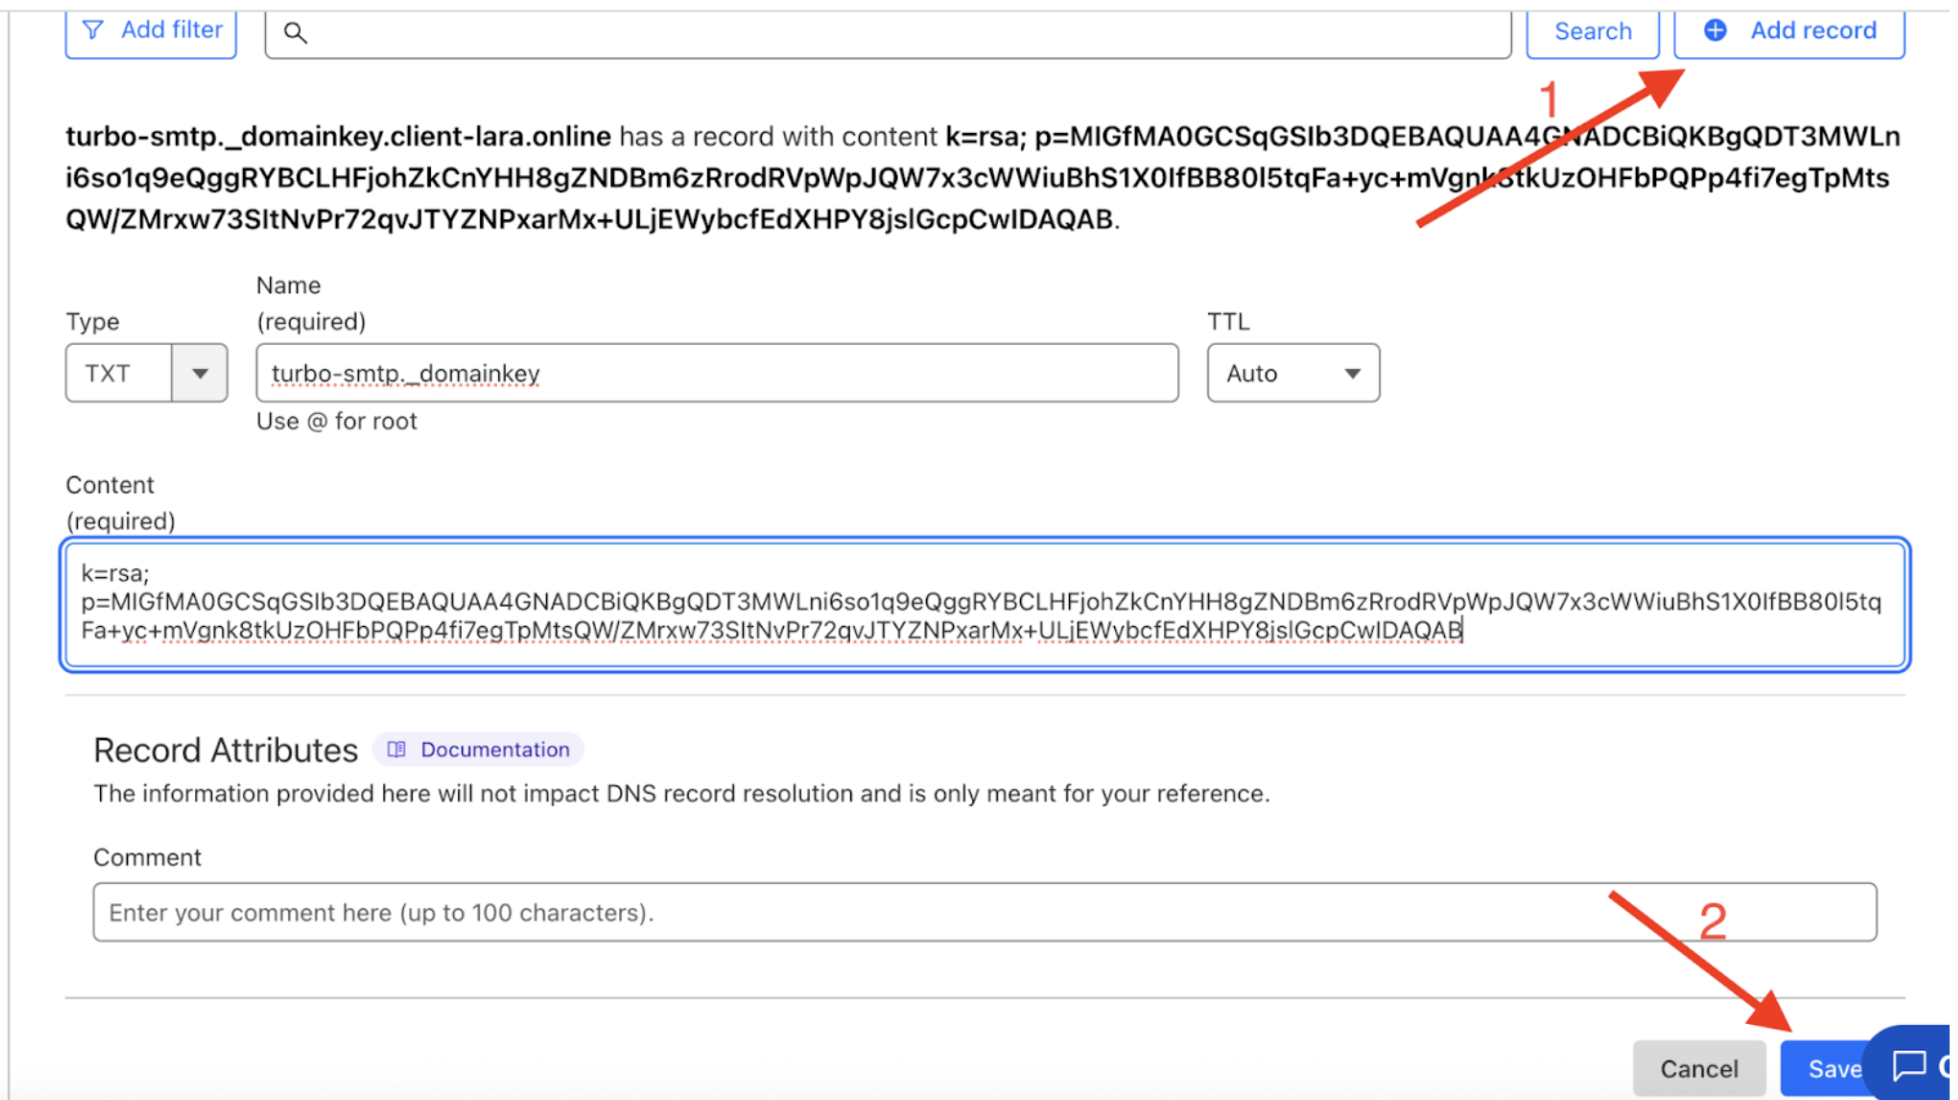
On the next page click the **Add record** button and fill in the data provided by **TurboSMTP.**
After entering the record click the ***Save*** Add Domain.
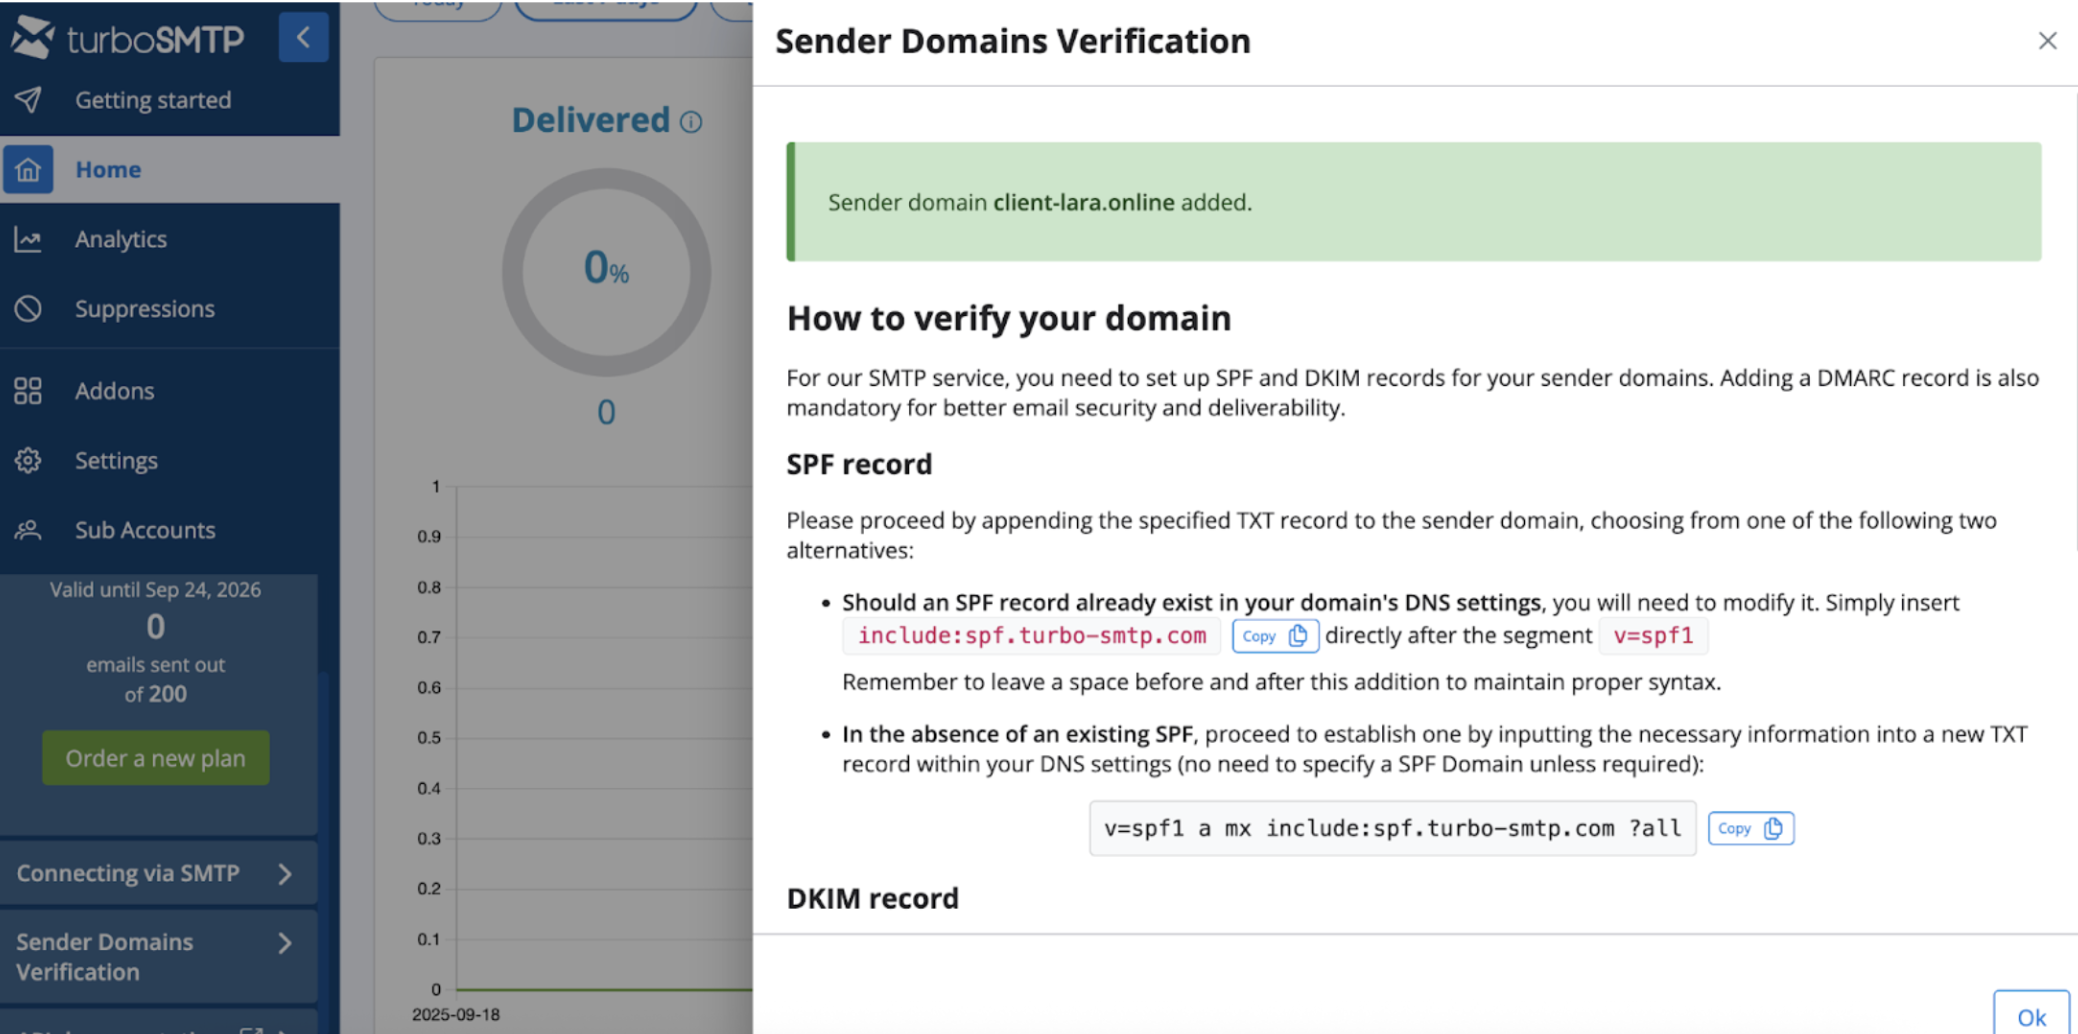
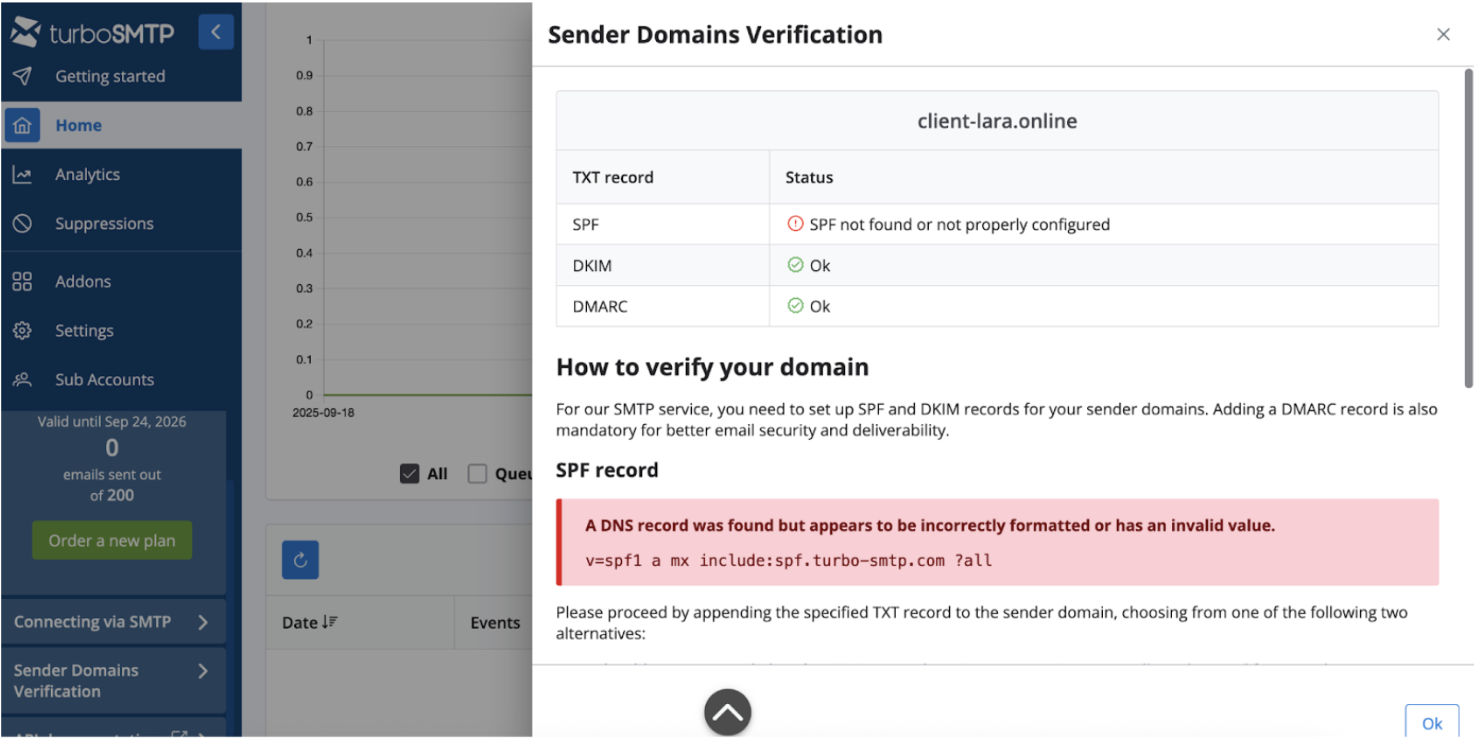
2.11 Next you will see instructions which DNS records need to be added to verify the domain
2.12 For this go to your account
to save.\
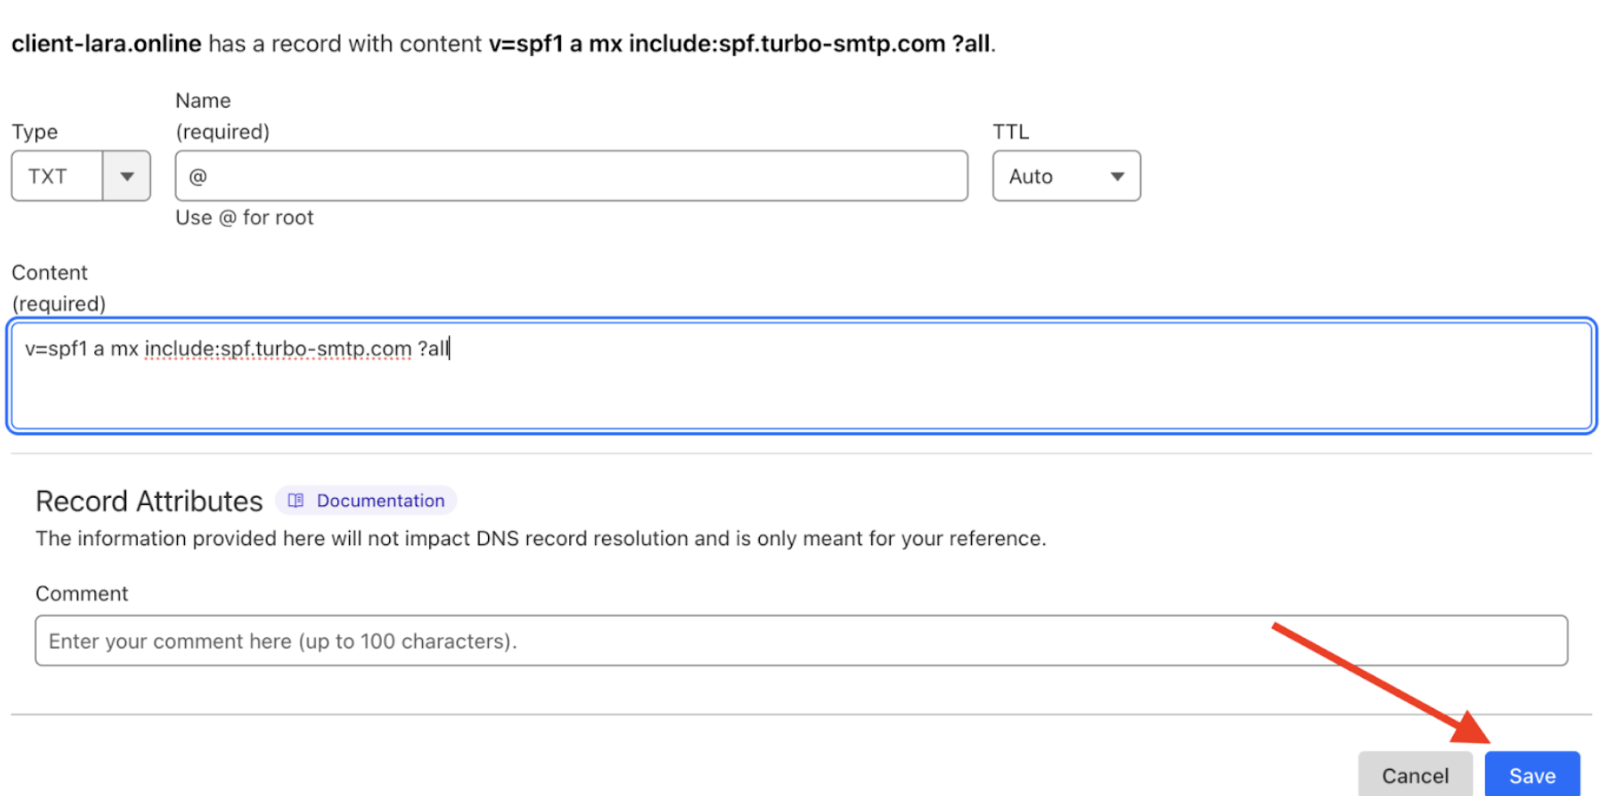
SPF record\
Type: TXT\
Name/Host: enter @\
Value/Content: copy the one provided by TurboSMTP (v=spf1 a mx include:spf.turbo-smtp.com ?all)\
Save the record with the Save button. **TurboSMTP** DKIM record\
Type: TXT\
Name/Host: turbo-smtp.\_domainkey\
Value/Content: copy the key provided by TurboSMTP\
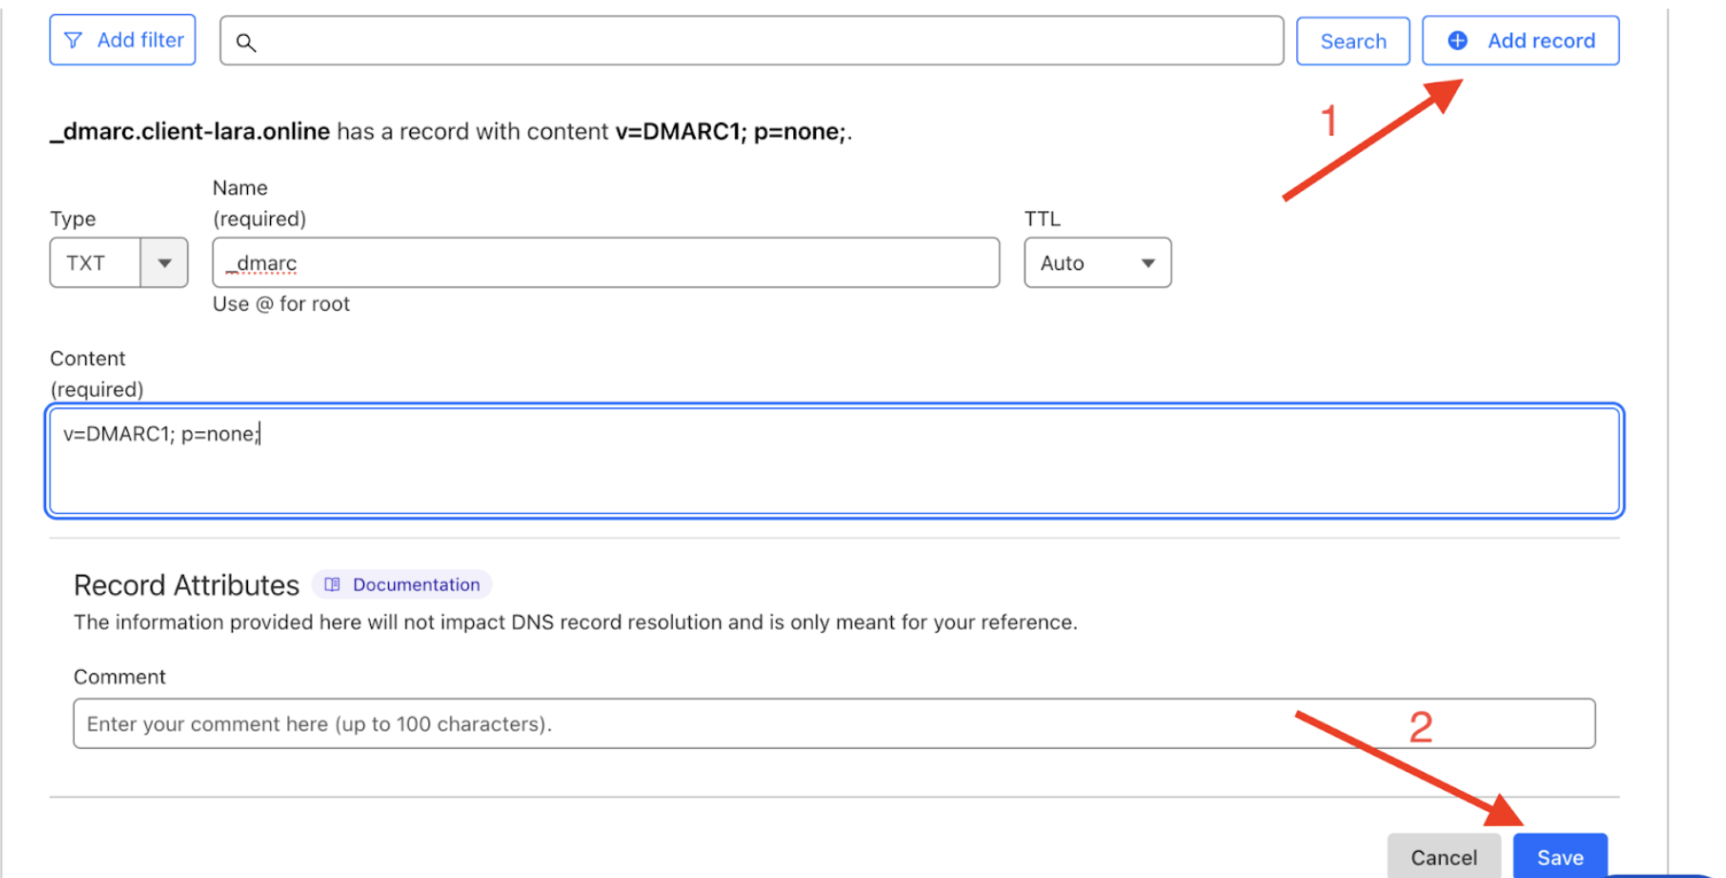
Save the record with the Save button. **DMARC record**\
**Type: TXT**\
**Name/Host: \_dmarc**\
**Value/Content: copy the value v=DMARC1; p=none;**\
**Save the record with the Save button.**
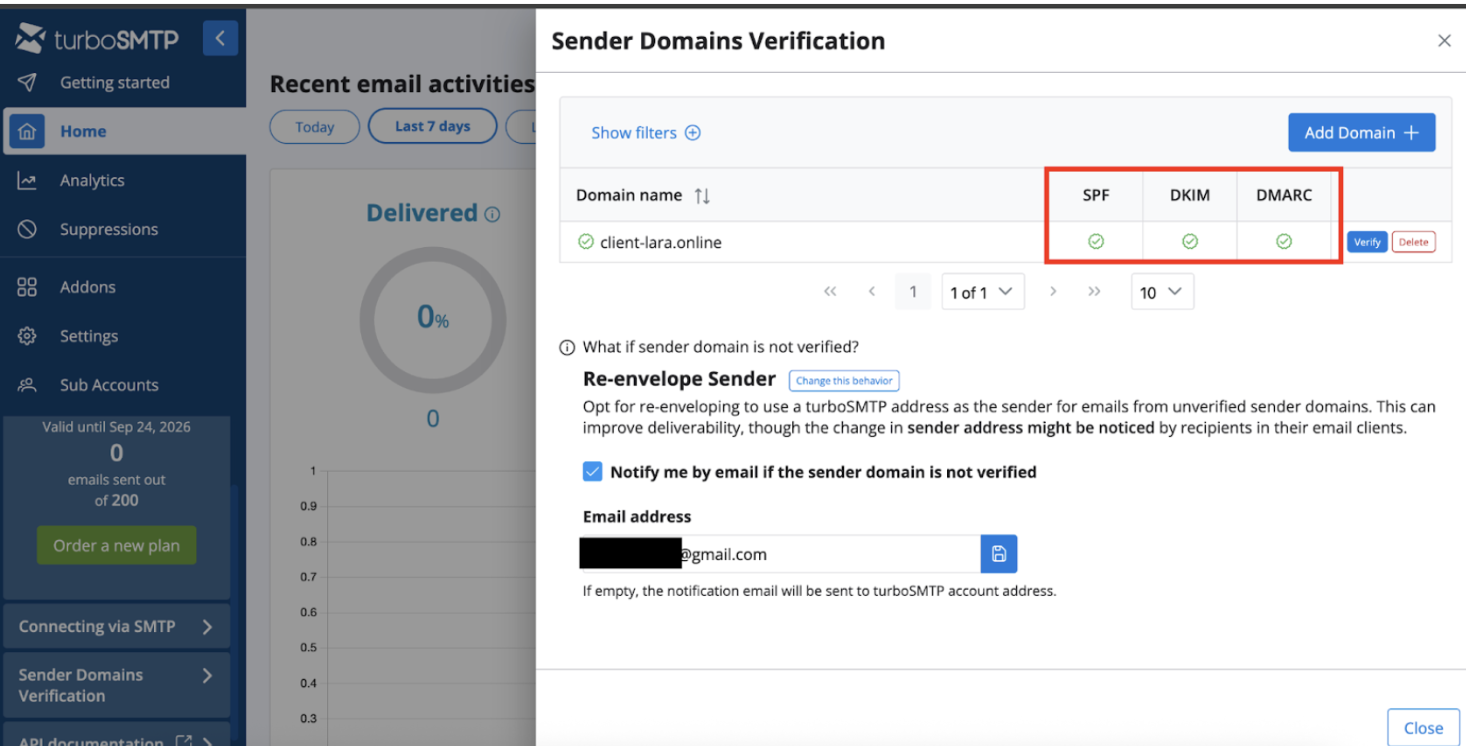
2.13 **After adding all the records return to** and click the **OK** button. Important:
the domain may not be verified immediately. Wait until all three records are successfully checked. To speed up the process, periodically click the **OK** Verify\
\&#xNAN;*button next to the domain.*\
Also after clicking
you may see the message:
“A DNS record was found but appears to be incorrectly formatted or has an invalid value.”
If you entered everything correctly in Cloudflare, then the changes simply have not yet propagated. **When the domain is successfully verified you will see the verification status. Below is an example of how it looks.** 2.14 SMTP setup in the admin panel:
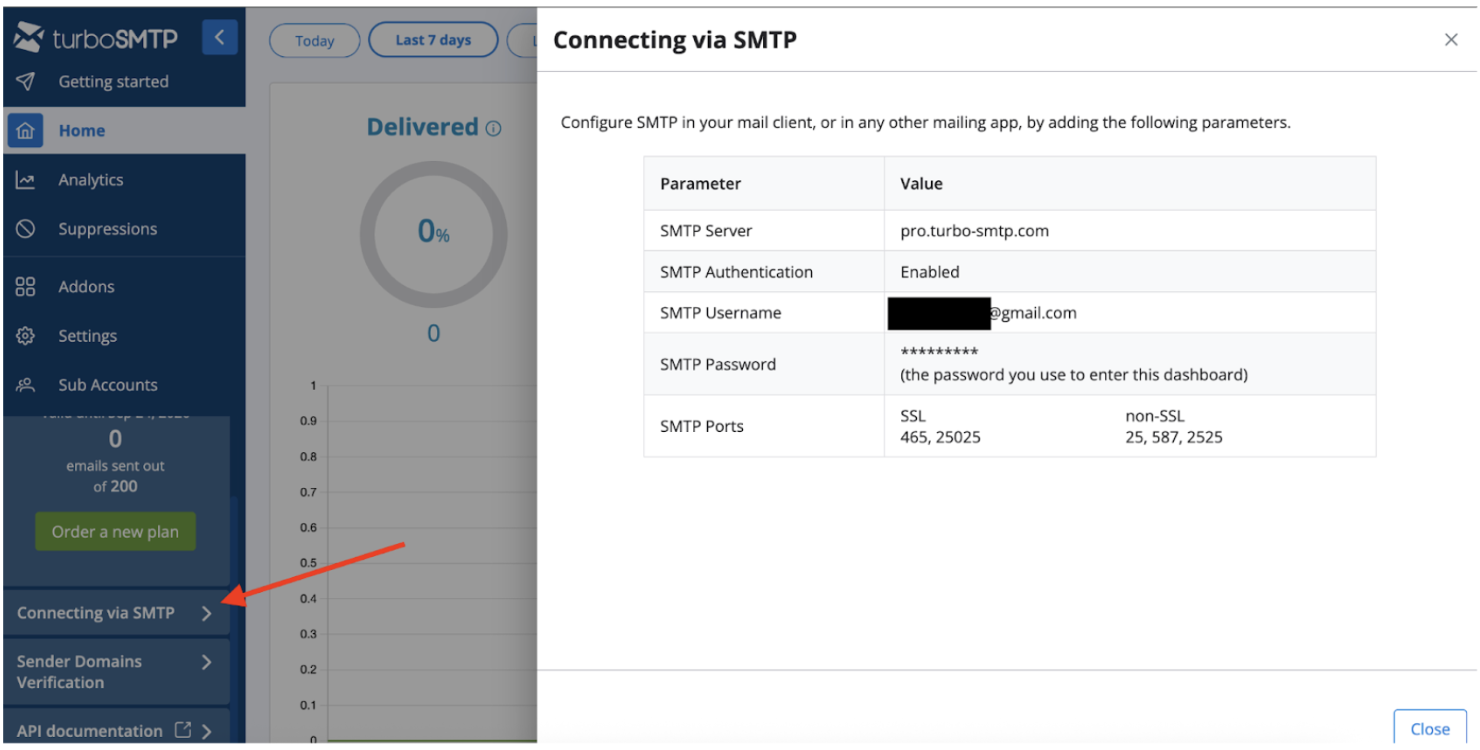
First obtain the credentials for connection: go to the menu **Connecting via SMTP**in your TurboSMTP account.
* **Host:** Go to your site's admin panel:*Settings → SMTP Settings*.\
Fill in the fields: [the value from TurboSMTP (](http://pro.turbo-smtp.com/).
* **Port:** Go to your site's admin panel:*Port*SMTP Server
* **), for example** Go to your site's admin panel:*pro.turbo-smtp.com*).
* **), it is recommended to use 587.** Username:
* **Sender address:** noreply\@YOURDOMAIN.
* **SMTP Username** Password: