# WhiteBit
**Instructions for adding the WhiteBit merchant (or similar) in the Lara Script admin panel**
The process of connecting the WhiteBit merchant is simple and takes 5–10 minutes. It allows automating crypto/fiat exchanges via the WhiteBit API. If the merchant is similar, the process is alike — you fill in keys and settings. Here is a step-by-step guide:
**Step 1: Prepare the data**
* Register an account on WhiteBit (whitebit.com) and create API keys in the "API" section (a verified corporate account is required for exchanges).
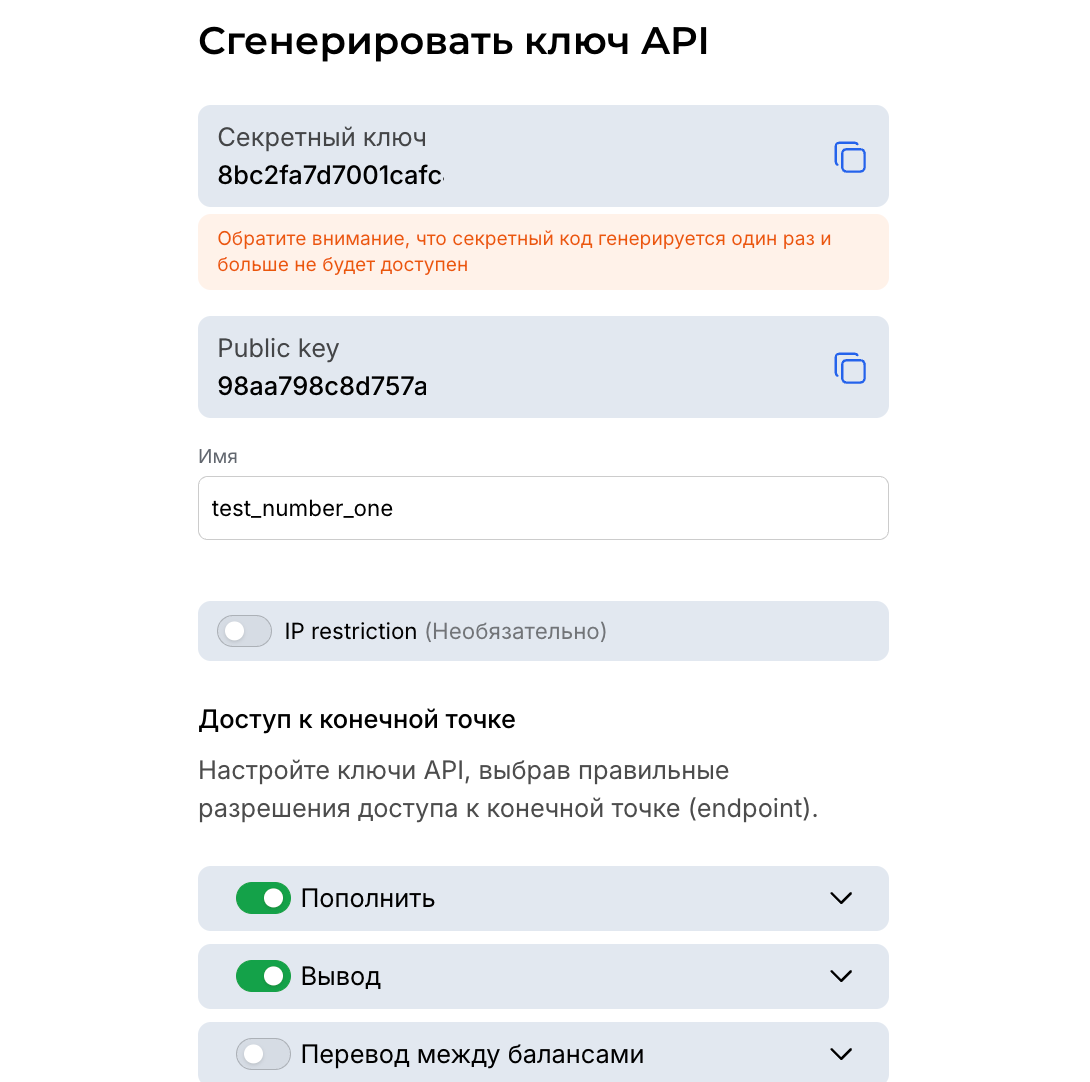
* Obtain 4 keys: Public key, Secret key, Webhook public key, Webhook secret key (generated in the WhiteBit dashboard).
* Prepare settings: order statuses for auto-processing (for example, "new", "deleted", "rejected").
**Tip for beginners**: If you do not have API keys, go to WhiteBit > Profile > API > Create key. Enable read/write permissions for trading and withdrawals.
To correctly configure the WhiteBit merchant and Telegram bots, you need to enable the webhook in the WhiteBit dashboard.\
• Specify the webhook address: [**http://\*your-website-name\*/notification/whitebit**](http://nextbit.me/notification/whitebit)\
• Then in the merchant settings add the keys **"Webhook public key"** and **"Webhook secret key"**.\
• After filling in these fields you need to complete domain verification — for this choose the method via a request to the endpoint **/whiteBIT-verification**.\
\
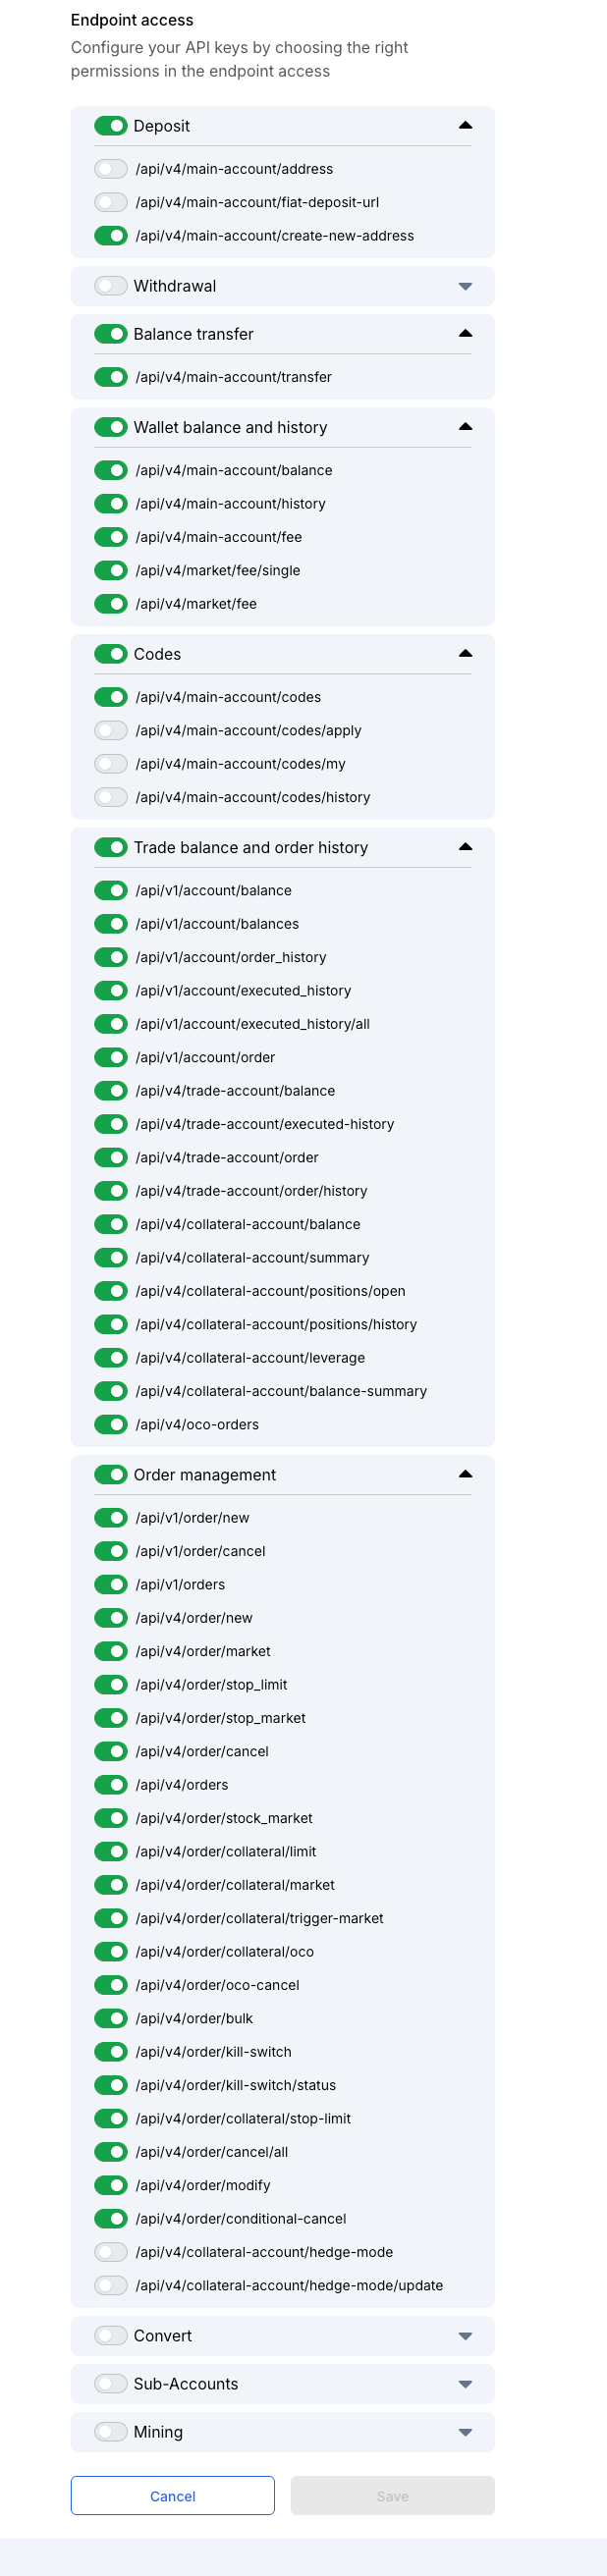
**In order for this merchant to work correctly in the future as a method for auto-payouts, you must select the following list of permissions**
\
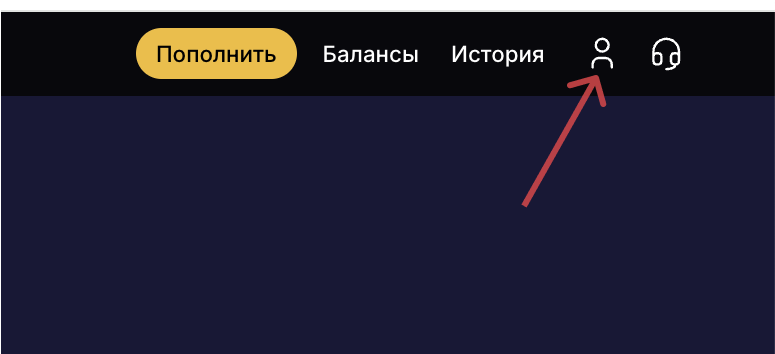
**Step 2: Go to the admin section**
* Log in to the Lara Script admin panel.
* Go to "Merchants" > "WhiteBit" (or the equivalent section for other merchants).
* If the merchant is not in the list, contact our support and we will promptly consider adding it.
**Step 3: Fill in the fields**
Fill out the form in the admin panel. Here is how to do it step by step:
1. **Public key**\*: Paste the public key from the WhiteBit API (for example, d4afjd642a7e3bdd3ee1e346xzfjknzd08). This key is for authenticating read requests (rates, balances).
* Tip: Check the key for errors — it must be unique and contain no spaces.
2. **Secret key**\*: Paste the secret key. It is needed to sign requests for withdrawals/trading. Do not share it!
* Tip: Store the secret key in a secure place (for example, in a password manager). If you lose it, generate a new one on WhiteBit.
3. **Webhook public key**\*: Paste the webhook public key (for example, d0d642a7e3bdd3ee1e346e0e088e08). For verifying incoming webhook requests from WhiteBit (transaction statuses).
* Tip: Enable the webhook on WhiteBit in API > Webhooks, specifying your site's URL.
4. **Webhook secret key**\*: Paste the webhook secret key. For signing incoming requests.
5. **Select the order statuses for automatic processing**\*: Select statuses from the dropdown (for example, "New", "Awaiting confirmation"). This determines when the system automatically processes orders.
* Tip: Start with "New" and "Awaiting confirmation" for tests. If the merchant is Payeer, statuses are similar but without a webhook.
6. **Time interval for generating WhiteBit codes**\*: Specify the interval (for example, 22:00). This is the period for generating exchange codes.
**Step 4: Save and test**
* Click "Save" at the bottom of the form.
* Check the integration: Create a test order and verify whether statuses update automatically, whether a payment address is generated automatically and whether it is correct.
**Security warnings**: Never share the keys. If you suspect a leak, generate new ones on WhiteBit and update them in the admin panel. For other merchants (like Payeer) — similarly, but with additional account verification.
**Tip for renters**: If you rent the admin panel, we will provide ready-made key templates and free setup assistance.\
Also, if the generated APIs are not used within 2 weeks after their generation on WhiteBit, such keys will be deactivated until reactivation
#### Updating deposit handling logic (WhiteBit)
In the latest update the deposit handling logic was changed for orders where the merchant is **WhiteBit**.
Now, if for an order a **non-target currency** (for example, the order was created for USDT, but USDC was actually credited), the following handling logic applies:
* At the deposit confirmation stage the order behaves normally:\
when a transaction is received the order remains in the status **"Awaiting confirmation"**, similar to cases with the target currency.
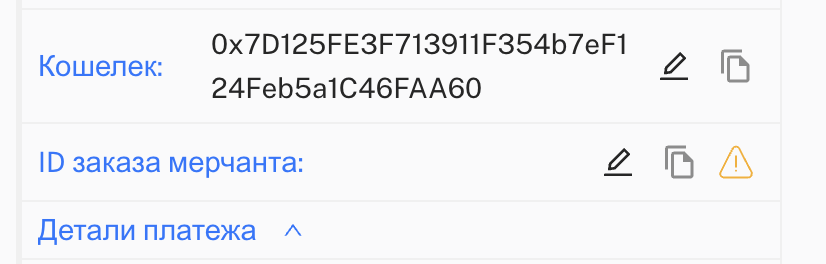
* After the deposit receives all required confirmations, if the deposit currency does not match the order currency, the order is automatically moved to the status **"Under review"**.
* In the operator interface next to the field with the transaction hash a **warning indicator (yellow triangle)**, signaling the need for manual review of the order.
This change allows quickly identifying and processing orders for which a deposit was credited in an incorrect currency.